Learn how to make code listings in LaTeX look very aesthetic using Minted package
- Getting started with Minted package
- Code Highlighting in LaTeX
- Minted environment options
- Floating Lists in LaTeX
- Code highlight styles in LaTeX
It is very common having to write code listings in LaTeX, in order to illustrate a given algorithm., especially with computer science-related manuals. For this purpose, LaTeX offers the environment verbatim that lets you write code listings like this:

which is obtained by the following code:
% Code listing in LaTeX using verbatim
\documentclass{article}

\begin{document}

\begin{verbatim}
    def show_verbatim():
        print("Hello verbatim world!")
    show_verbatim()
\end{verbatim}

\end{document}
which are literal and therefore insensible to control sequences, environments, etc. It also has an in-line equivalent \verb, which lets you enclose in any kind of delimiters the text inside.
This kind of listing looks rather dull; we all want the nice color schemes we are used to in our IDEs or text editors. These colors not only make the code more artistic, but they make it more readable, especially for long listings. In this tutorial I’m going to show you how to use the minted package to produce nice-looking and customizable code listings, with highlighted syntax.
Installation
In this section, we are going to see quickly how to install minted. Please note If you can load minted package via \usepackage{minted} and compile without any errors, then you should skip to the next section. The main difference between minted and similar packages is that the former makes use of the additional software Pygments, which provides much better syntax highlighting.
To install Pygments you need Python 2.6 or latter installed in your computer. In case you don’t have Python already, you can download it from here. Once you have Python installed, you can use the pip tool to install Pygments: just run pip install pygments in the command line as an administrator, check the following video:
mintedalso requires a series of LaTeX packages to be installed and up to date in your system:keyval, ifthen, kvoptions, calc, fancyvrb, ifplatform, fvextra, pdftexcmds, upquote, etoolbox, float, xstring 2.3, xcolor lineno, framed, shellesc (for luatex 0.87+).
All of them come with the usual LaTeX distributions, so probably you don’t have to worry about it. Once you have all of this, you can install minted as any other package, from you LaTeX package manager or from CTAN.
Since minted needs to call Pygments, which is an external program, you need to allow the LaTeX processor to do so by passing it the -shell-escape option. So you need to call the processor like this:
The same is true for other compilers if you are using them.
If all of these seems too much for you and you don’t want to worry about anything I have written about so far, I strongly recommend you use Overleaf.
Code Highlighting in LaTeX
This is an example of minted basic usage. We use the minted environment to write some Python code:
% Using Minted for code listing
\documentclass{article}

\usepackage{minted}

\begin{document}

\begin{listing}
    \begin{minted}{Python}
        def hello_world():
            print("Hello floating world!")
    \end{minted}
    \caption{Floating listing.}
    \label{lst:hello}
\end{listing}

\end{document}
Compiling the first code yields the following result:
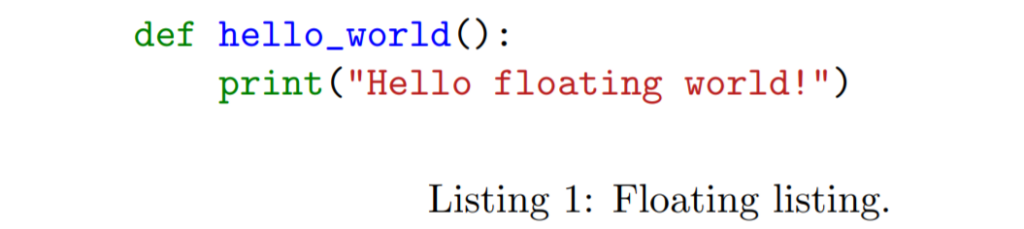
So we see that the use of minted package is straightforward: we only have to start a minted environment and put inside braces the language highlighting we want.
Code listing of a File in LaTeX
Instead of going smaller, we can go bigger, printing and highlighting whole files. For this purpose there is the \inputminted{tex}{filename.tex} command, where you pass the language highlighting and the file you want to input, and this file is written as a block of minted code.
% Using Minted for file code listing
\documentclass{article}

\usepackage{minted}

\begin{document}

\inputminted{tex}{ex1.tex}

\end{document}
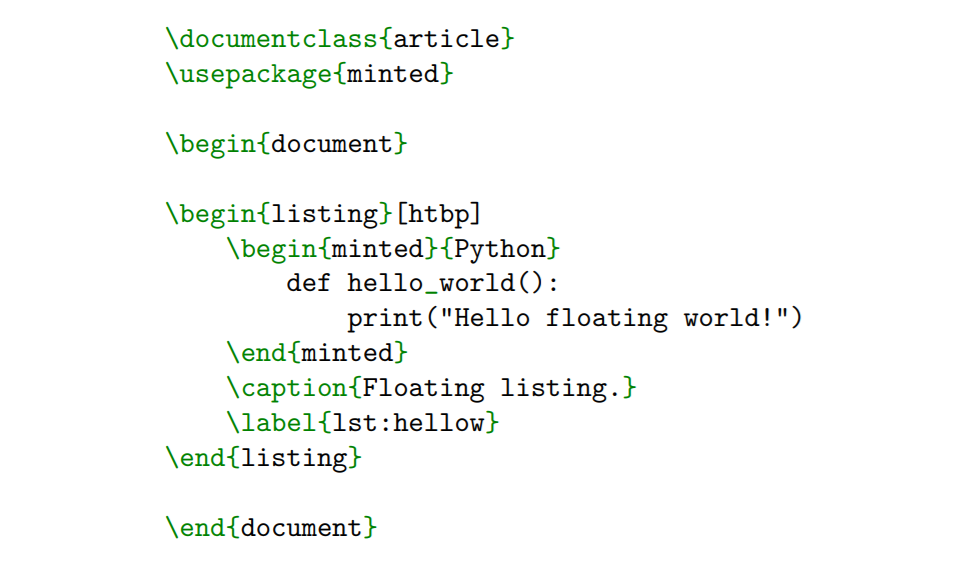
where ex1.tex file contains the following code:
% ex1.tex file content
\documentclass{article}
\usepackage{minted}

\begin{document}

\begin{listing}[htbp]
    \begin{minted}{Python}
        def hello_world():
            print("Hello floating world!")
    \end{minted}
    \caption{Floating listing.}
    \label{lst:hellow}
\end{listing}

\end{document}
Compiling the previous code, we get the following result:
Inline Code listing in LaTeX
To typeset code inline, the command \mintinline{c}|int i| is provided. Again, the delimiters can be changed, according the listed code. Here is an example:
% Inline code listing
\documentclass{article}

\usepackage{minted}

\begin{document}

Here is an example of a line code \mintinline{c}|int i| .

\end{document}
Compiling this code yields:

Minted command and environment options
All the above mentioned minted code highlighting commands accept the same set of options, as a comma-separated list of key=value pairs. Here is a list of the most remarkable ones:
autogobble(boolean): Automatically remove all common leading whitespace from code. If you don’t like the work done, you can always usegobble(integer) and pass an integer to it, so that the amount of characters passed is deleted from the start of all lines.breaklines(boolean): Automatically break long lines inminted environmentsand\mintcommands, and wrap longer lines in\mintinline. By default, automatic breaks occur only at space characters. You can set to truebreakanywhereto enable breaking anywhere. There are further breaking options (such asbreakbytoken, breakbytokenanywhere, breakbeforeandbreakafter) that we are not going to explore here. Refer to the package documentation in CTAN for more details.bgcolor(string): Sets the background color of the listing. The string must be the name of a previously-defined color.codetagify(list of strings): Highlight special code tags in comments and docstrings. The default list of code tags is:XXX, TODO, BUG,andNOTE.curlyquotes(boolean): When your keyboard doesn’t have left and right quotes, the backtick ` and the single quotation mark ‘ are used as left and right quotes in most places (for example, in LaTeX).mintedwrites them literally by default, but if this option is set to true, they are substituted by the curly left and right quotes.escapeinside(string): This makesmintedescape to LaTeX between the two characters specified in the string. All code between the two characters will be interpreted as LaTeX and typeset accordingly. The escape characters need not be identical. This has a few exceptions, however: escaping does not work inside strings and comments (in the later case, you may want to use thetexcommentsoption).fontfamily, fontseries, fontsize, fontshape: These self-descriptive options let you customize the font used inside themintedenvironment.linenos(boolean): Enables line numbers. It can be accompanied withnumberblanklines(boolean), which enables or disables the numbering of blank lines.mathescape(boolean): Enables the usual math mode inside comments.samepage(boolean): Forces the whole listing to appear in the same page, even if it doesn’t fit.showspaces(boolean): Enables visible spaces with a small horizontal line . You can redefine the invisible space character passing a new macro to the optionspace(macro); by default, the\textvisiblespacemacro is passed.stripall(boolean): This option strips all leading and trailing whitespace from the input.tabsize(integer): This is the number of spaces a tab will be converted to, unlessobeytabs(boolean) is active, in which case tabs will be preserved. If you are decided to use tabs, similar options for showing tabs and setting the invisible tabs character are available.
In every boolean option, you can omit the =true part, and just write the option name.
Floating listings
In certain situations, or for certain tastes, it is better to treat the code listings as floating objects. For this matter, minted provides the listing environment that you can wrap around any source code block. As it is usual for floating objects, you can provide a \label{} and a \caption{}, and also the usual placement specifiers, check the first example.
As happens with figures and tables, you can create an index of all of the floating listings in the document using \listoflistings. In case you are going to use floating listings and reference them within the text, you may want to change how \LaTeX counts them: you can choose whether the chapter or the section should be used. In order to do that, you have to load the package with the chapter or section option:
% List of listings numbering

% Counts follows sections' numbering
\usepackage[section]{minted}

% Counts follows chapters' numbering
\usepackage[chapter]{minted}
Customizing the syntax highlight
If you are reading this you probably like programming, and in that case you almost sure like to customize the color schemes of your code editors, and the appearance of the minted listings shouldn’t be less.
Instead of the default minted style, you may set the style you want using \usemintedstyle[language]{stylename}. This sets the stylename for the given language; if you don’t specify any language, the style is set for the document as a whole. To try out all the available stylesheets with any given language you can visit the Pygments website. In fact, you can also see the list of all supported languages, which probably are more than you have heard of. Here is a screenshot of code highlighting choice:
And that’s all for the minted package. I’m sure from now on your listings in LaTeX will look very aesthetic, which will make reading your documents even more pleasing.