In this tutorial, we are going to learn how to use the minipage environment.
- Before we start using it, we will learn what it does and how it works, and to do so we will have to understand some basic TeX concepts such as what is a box and how does TeX processes our document. Although we won’t go into much detail, you will know the basics to understand how the minipage environment works, and thus how to use it properly.
- Once we understand it, we will jump right into how to use it and what are the different options that this environment offers: width, external and internal positioning, footnotes, and much more!
- Next, we will focus on how to insert figures inside a minipage environment. This is not a trivial matter, since we can’t insert a figure environment inside a minipage (we will explain why is that). However, we will exploit some commands that the caption package offers to emulate the behavior of the figure environment inside the minipage.
- After all of this, we will see how to put frames around the minipage environment and how to customize the background color using the capabilities of the xcolor package.
- Finally, we will see how to rotate a minipage environment and how to use it to write text in two columns when inside a single-columned document and vice versa.
1. What is the minipage environment?
The short answer is that minipage is an environment to produce parboxes in LaTeX. Probably this doesn’t tell anything to you, so we are going to break it down and see what it means. To do so, however, we will have to dive into the basics of LaTeX and its underlying system TeX. Don’t worry if you don’t care about technical details: I am going to put it in simple terms, so it is not a dense read, and you have the basic ideas to understand the following sections.
Parboxes are nothing but boxes written in paragraph mode. Here arise two concrete questions: first, what are boxes, and second, what is paragraph mode.
Let’s tackle the first. When LaTeX processes your input text, it is always in one of three modes:
- paragraph mode,
- math mode,
- left-to-right mode.
Paragraph mode is LaTeX’s normal mode, the one used when processing ordinary text. In paragraph mode, your input is regarded as a sequence of words and sentences to be broken into lines, paragraphs, and pages.
To better understand this, we have to answer the first question and explain what boxes are.
A box is a chunk of text that TeX treats as a unit. Boxes are the indivisible components of your document, that TeX puts together to produce the output that you see. A box cannot be split across lines or pages. Letters are boxes, but there are other environments that produce boxes, such as the array, tabular, and picture environments.
So the minipage environment produces parboxes, which are boxes written in paragraph mode. That is, the environment contains a sequence of words that LaTeX writes in paragraph mode (so that it splits them into lines, if necessary) and then becomes a single box, a TeX indivisible unit. We will see that, in fact, the minipage can contain other boxes that are not words, but that will regardless be processed in paragraph mode.
2. Basic use
Now let’s see how to use the minipage environment in practice. This environment takes as a mandatory argument the width of the text since TeX needs to know, before breaking text into lines, how wide the lines should be. Of course, this argument is a TeX dimension.
Here is an example of how you can use it:
% Basic use of minipage environment
\documentclass{article}

\begin{document}

Look at this text,
\begin{minipage}{3cm}
This text is processed in paragraph mode, and then becomes an indivisible \TeX{} box.
\end{minipage}
how strange!
\end{document}

\end{document}
which produces:

This output may surprise you; in that case, you haven’t understood the first section of the tutorial. But don’t worry, we are going to review what is happening here.
- First, the minipage environment is processed in paragraph mode; that is, its contents are written as usual LaTeX words. However, we specify the width of the lines to be 3cm.
- Once LaTeX has split the words into lines to produce a paragraph, this paragraph becomes a single box. This means that it becomes an indivisible unit; you can think of it as if it were just a big letter, it’s behaviour will be the same.
- Now, outside the environment, I write a usual sentence, in the middle of which I insert the previously generated box. Thus the result that is shown in the above illustration.
3. Indentation in minipage environment
You can see that there is no indentation at the beginning of the paragraph inside parboxes. This is because LaTeX sets the \parindent parameter, which specifies the amount of indentation, to zero inside a parbox. You can specify any other value with the \setlength command. For example:
% Indentation in minipages
\documentclass{article}

\begin{document}

Look at this text,
\begin{minipage}{3cm}
\setlength{\parindent}{2em}
This text is processed in paragraph mode, and then becomes an indivisible \TeX{} box.
\end{minipage}
how strange!
\end{document}

\end{document}
This code produces the following result:

The unit used for the indentation is the
em, which is the width of an “m” letter in the current font.
Other document distances may be changed as well, such as the margins, but it is usually not necessary since you determine explicitly the width of the minipage.
4. Text alignment
By default, LaTeX text is justified, and the minipage environment is not an exception. However, you can change the text alignment inside the environment using the tools provided by the ragged2e package . use the command:
\raggedrightto produce left-aligned text,\raggedleftto produce right-aligned text,\centeringto produce centred text.
These commands change the alignment of text until you exit the environment, or until you use a new text alignment command. This means that you can have multiple alignments inside the same minipage environment, and also go back to justified text using \justify.
5. Vertical alignment of minipage content
In previous examples, the paragraphs produced by the minipage are positioned vertically so that the center of the box is aligned with the center of the text line. This can be modified with an optional first argument:
tandbalign the top and bottom line of the parbox with the text line, respectively.
In this example, we test how different positioning options look:
% Vertical alignmemnt of minipage content
\documentclass{article}

% Change page layout
\usepackage[margin=2cm]{geometry}

\begin{document}

This is
\begin{minipage}[b]{2.5cm}
    \textbf{A paragraph aligned at the bottom.}
\end{minipage}
and this is
\begin{minipage}{2.5cm}
    \textbf{A paragraph aligned at the centre.}
\end{minipage}
and the last one is
\begin{minipage}[t]{2.5cm}
    \textbf{A paragraph aligned at the top.}
\end{minipage}

\end{document}

\end{document}
which produces:

We can further customize how high or low a minipage box is with respect to the baseline of text using the \raisebox command. This command takes two mandatory arguments:
- the first one is a TeX dimension and determines how high (if it is positive) or low (if it is negative) the box will be (again, with respect to the base line of text) and
- the second is the actual box.
In the following example, we illustrate its use:
% Set vertical positioning of LaTeX minipage
\documentclass{article}

\begin{document}

This text is
\raisebox{-10ex}
{
    \begin{minipage}{2cm}
        \textit{way below}
    \end{minipage}
} the base line of text

\end{document}
Compiling this code yields the following output:

This code is really overkilling: since lines, once processed by TeX, become boxes, we could have obtained the same result in this case without minipage. However, if we wanted to insert images, for example, the minipage environment would be needed to create a single box from all the content.
6. Footnotes in LaTeX minipage
As a final note, it is interesting to note that, when used inside a minipage environment, the footnote command puts a footnote at the bottom of the parbox produced by the environment. Here is an illustrative example:
% Footnotes in LaTeX minipage
\documentclass{article}

\begin{document}

This is the main line of text
\begin{minipage}{3cm}
    This text needs some\footnote{footnote}
\end{minipage}

\end{document}
which yields the following:

7. Height and inner position options
There are other, less common options, that the minipage environment admits. The general syntax when beginning the environment is the following:
\begin{minipage}[position][height][inner-pos]{width}
We have already talked about the mandatory argument width and the optional argument position. As you may have guessed,
heightspecifies the height of the minipage, and thus is a TeX dimension. You can enter any value and
the natural height of the parbox will be changed to this value.- Finally, the
inner-posoptional argument controls the vertical placement of the contents
inside the box. It defaults to the value specified in position. However, you can pass any of these four options:tto place the contents at the top,cto place the contens at the center,bto place the contents at the bottom,sto stretch the contents out vertically (it must contain vertically stretchable space).
In the following example you can see how the different inner positions look:
\documentclass{article}

\begin{document}

Don’t go down the stairs!\hspace{3em}
\begin{minipage}[c][3ex][t]{2em}
    stair
\end{minipage}
\begin{minipage}[c][3ex][c]{2em}
    stair
\end{minipage}
\begin{minipage}[c][3ex][b]{2em}
    stair
\end{minipage}

\end{document}
which yields:

Observe that:
- We have created three minipage environments with a fixed height: 3ex, which corresponds to the height of three
‘x’ letters in the current font. - We have used the third optional argument to position the text inside the minipage differently in each case, while maintaining the minipage position always centred with respect to the text (setting the first optional argument to
c).
8. Inserting figures in minipage
You may think that inserting a figure inside a minipage environment consists of just writing the corresponding figure environment inside. If you do this, however, you will be faced with an error. This is due to the fact that the figure environment is a floating environment, while the minipage isn’t.
Still, you can load the graphicx package and use \includegraphics to insert an image inside a minipage environment, because this command creates a box with the figure file you pass to it, and it is not a floating object.
But you shouldn’t be satisfied with this, and neither I am, since you cannot put a caption and attach a label to cite the figure, as it is done with the figure environment. To emulate this behavior, we will be using the caption package written by Axel Sommerfeldt. This package, known for the infinite possibilities it provides to customize captions, defines the command \captionof, which is designed to typeset captions outside floating environments.
Observe in the following example how the behavior of the figure environment can be copied inside a minipage environment:
% Insert figure with caption in minipage
\documentclass{article}
\usepackage{graphicx}
\usepackage{caption}
\begin{document}
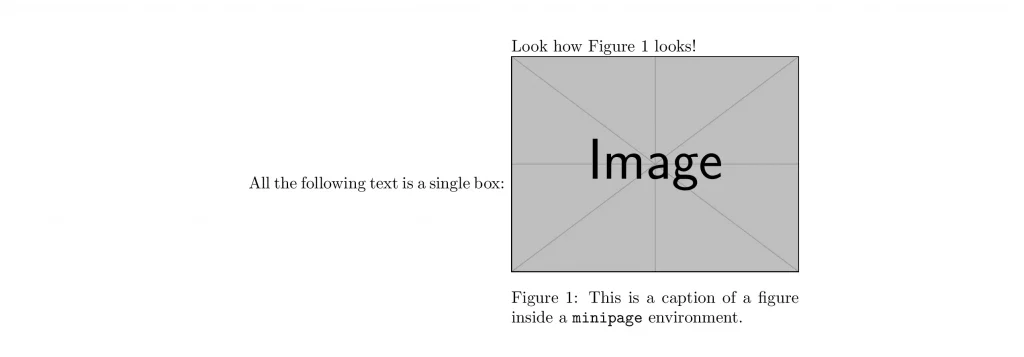
All the following text is a single box:
\begin{minipage}{0.5\textwidth}
Look how Figure \ref{fig:figure} looks!
\includegraphics[width=\textwidth]{example-image}
\captionof{figure}{This is a caption of a figure inside a \texttt{minipage} environment.}
\label{fig:figure}
\end{minipage}
\end{document}
This code produces the following result:
The syntax of the \captionof command is the following:
\captionof{float type}[list entry]{heading}
- The first mandatory argument,
float type, specifies the name to be put in the caption table (“Figure” or “Table”, generally). - The second mandatory argument,
heading, is the caption text itself. - Finally, the optional argument
list entryspecifies the name in the entry of this float in case you generate the corresponding list of floats (for the figure and table floats, LaTeX provides the commands\listoffiguresand\listoftablesto generate their corresponding lists).
Although less common, you may not want the figure inside the minipage environment to be printed on the list of figures nor referenced in any way. For this purpose, you can write the caption with
\captionof*and the
caption will be typeset without label and without entry to the list of figures.
9. Add a frame to minipage
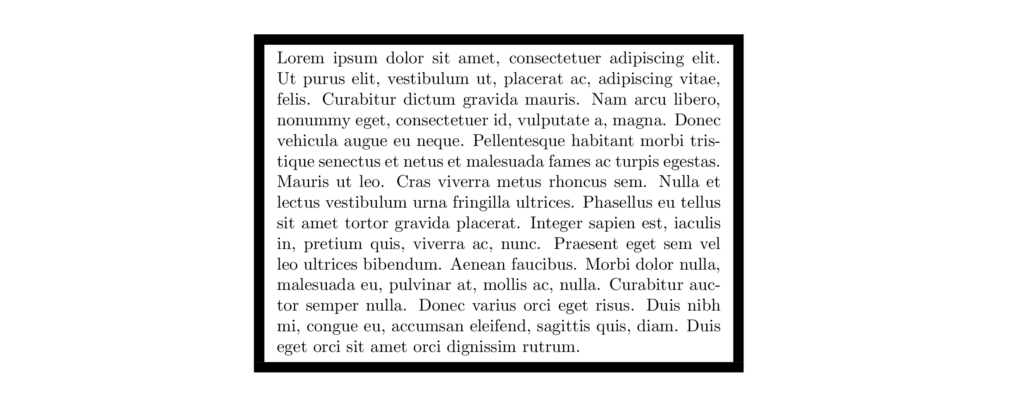
We can add a frame surrounding the minipage environment using LaTeX’s \fbox command. This command puts a frame around the box passed to it so that the code:
% Add frame to minipage
\documentclass{article}

% package to generate dummy text
\usepackage{lipsum}

\begin{document}

\fbox
{
\begin{minipage}{0.75\textwidth}
    \lipsum[1] % dummy text
\end{minipage}
}

\end{document}
which yields the following result:

We can even change the width of the box frame and the separation between the text and the frame adding the lines:
\fboxrule=6pt
\fboxsep=4pt
to the preamble of the document. The first of these lines sets the width of the frame and the second sets the separation between the text and the frame; both have to be set to a TeX dimension. The output, in this case, is shown below:
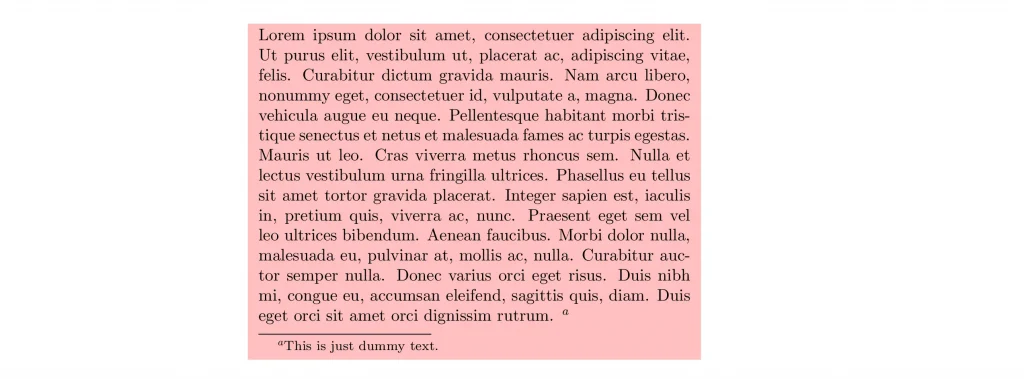
10. Background color of minipage
The most versatile tool to work with colors in LaTeX is the xcolor package. This package provides multiple tools, but the one we are interested in here is the \colorbox command. This command takes as a:
- First mandatory argument a colour,
- Second mandatory argument a box. This box is usually plain text, but in the case that concerns us it will be a minipage
environment.
In the next example we show how to easily color a minipage:
% Change background color of minipage
\documentclass{article}

% package to generate dummy text
\usepackage{lipsum}
\usepackage{xcolor}

\begin{document}

\colorbox{pink}
{
\begin{minipage}{0.75\textwidth}
    \lipsum[1] \footnote{This is just dummy text.}
\end{minipage}
}

\end{document}
which yields:
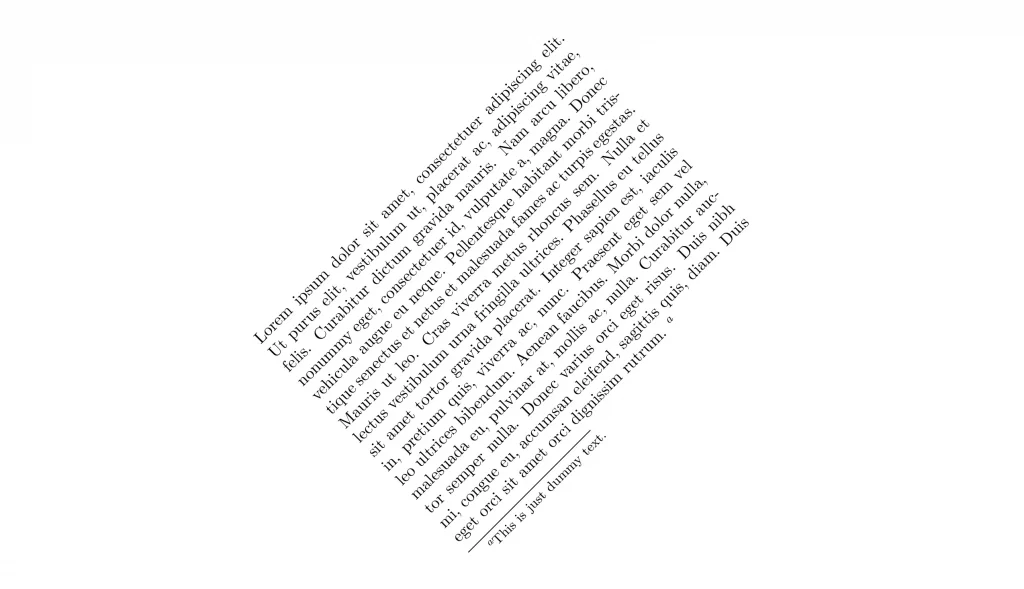
11. rotate minipage environment
Since the minipage environment produces a box, an indivisible unit, it can be rotated. To do so, we can use the command \rotatebox that comes with the graphicx package (usually used to insert images). This command takes two
mandatory arguments:
- the first is the angle counter-clockwise (in degrees) that the box will be rotated and
- the second one is the box itself.
In the following example, you can see how to use it:
% Rotate minipage box
\documentclass{article}

% package to generate dummy text
\usepackage{lipsum}
\usepackage{graphicx}

\begin{document}

\rotatebox{45}
{
\begin{minipage}{0.75\textwidth}
    \lipsum[1] \footnote{This is just dummy text.}
\end{minipage}
}

\end{document}
compiling this code yields the following result:
12. Two column’s content
The minipage environment can be used to produce double-column content in a single-column document and vice versa. Let me show you how to do it.
In the first case, we only have to put two minipage environments side by side, always making sure that the two boxes generated fit in the same line; in another case, they will be printed one on top of each other.
In the following example we use this possibility to add an explanation next to a figure:
% Two columns minipage in LaTeX
\documentclass{article}

\usepackage{graphicx}
\usepackage{caption}
\usepackage{lipsum}

\begin{document}

\lipsum[1]

\noindent \begin{minipage}{0.5\textwidth}
\vspace{1cm}
\includegraphics[width=\textwidth]{example-image}
\captionof{figure}{This is a nice figure caption.}
\label{fig:nature}
\end{minipage}
\hspace{0.05\textwidth}
\begin{minipage}{0.4\textwidth}
Here, I am going to make an extended explanation of Figure \ref{fig:nature} that will be printed next to it, in a smaller column.
\end{minipage}

\end{document}
This code produces the following image:

As you can see, the code contains some extra space to separate the figure from the previous paragraph, and the
explanation from the figure. The rest of the example is the same as we have seen previously, for example when using captions to insert images.
Note that the sum of the width of the image, the explanation, and the separation between the two has to be less than
\textwidth, so that the three fit on the same line!
In a similar manner, inside a two-column document, you can use a single minipage environment that spans the whole text width to produce single-column text.
Conclusion
Along with this tutorial we have seen how to deal with the minipage environment:
- what is it,
- what is it useful for,
- how you can position and rotate it,
- how you can colour and box it, and many more.
However, in all of these explanations, there is a common idea that has been always present (either implicit or explicitly): the idea of TEX’s boxes.
As was stated at the beginning, boxes are one of the fundamental objects (along with glue) that TEX uses to print our documents. So if all these explanations helped you understand what is a box, maybe you have extracted one of the most important ideas of this tutorial. Once you understand what a box is and how you can deal with it, all your LATEX live will be much easier!