A complete tutorial for creating all kinds of tables in LaTeX.
- Tabular Environment
- Aligning Cells
- Spacing in Tables
- Colors in Tables
- Changing Line Widths
- A Better Look with Booktabs
- Multi-Row and Multi-Column Cells
- Table Environment
- Changing Table Size
- Sideways Tables
- Multi-Page Tables
- Summary
There are two environments to manage tables in LaTeX. tabular environment is used to arrange the contents of the table. In tabular, we can typeset the material in rows and columns and set the lengths, alignments and general look of that content. Mainly, the substance of our table is within the tabular environment. table environment acts as a wrapper around the content in tabular, and it manages where the table is placed as a floating environment, its alignment according to other elements in the document, how to reference it, etc.
Tabular Environment
Let’s start by showing a very simple tabular example:
\begin{tabular}{c c c}
    A & B & C \\
    D & E & F \\
    G & H & I \\
\end{tabular}
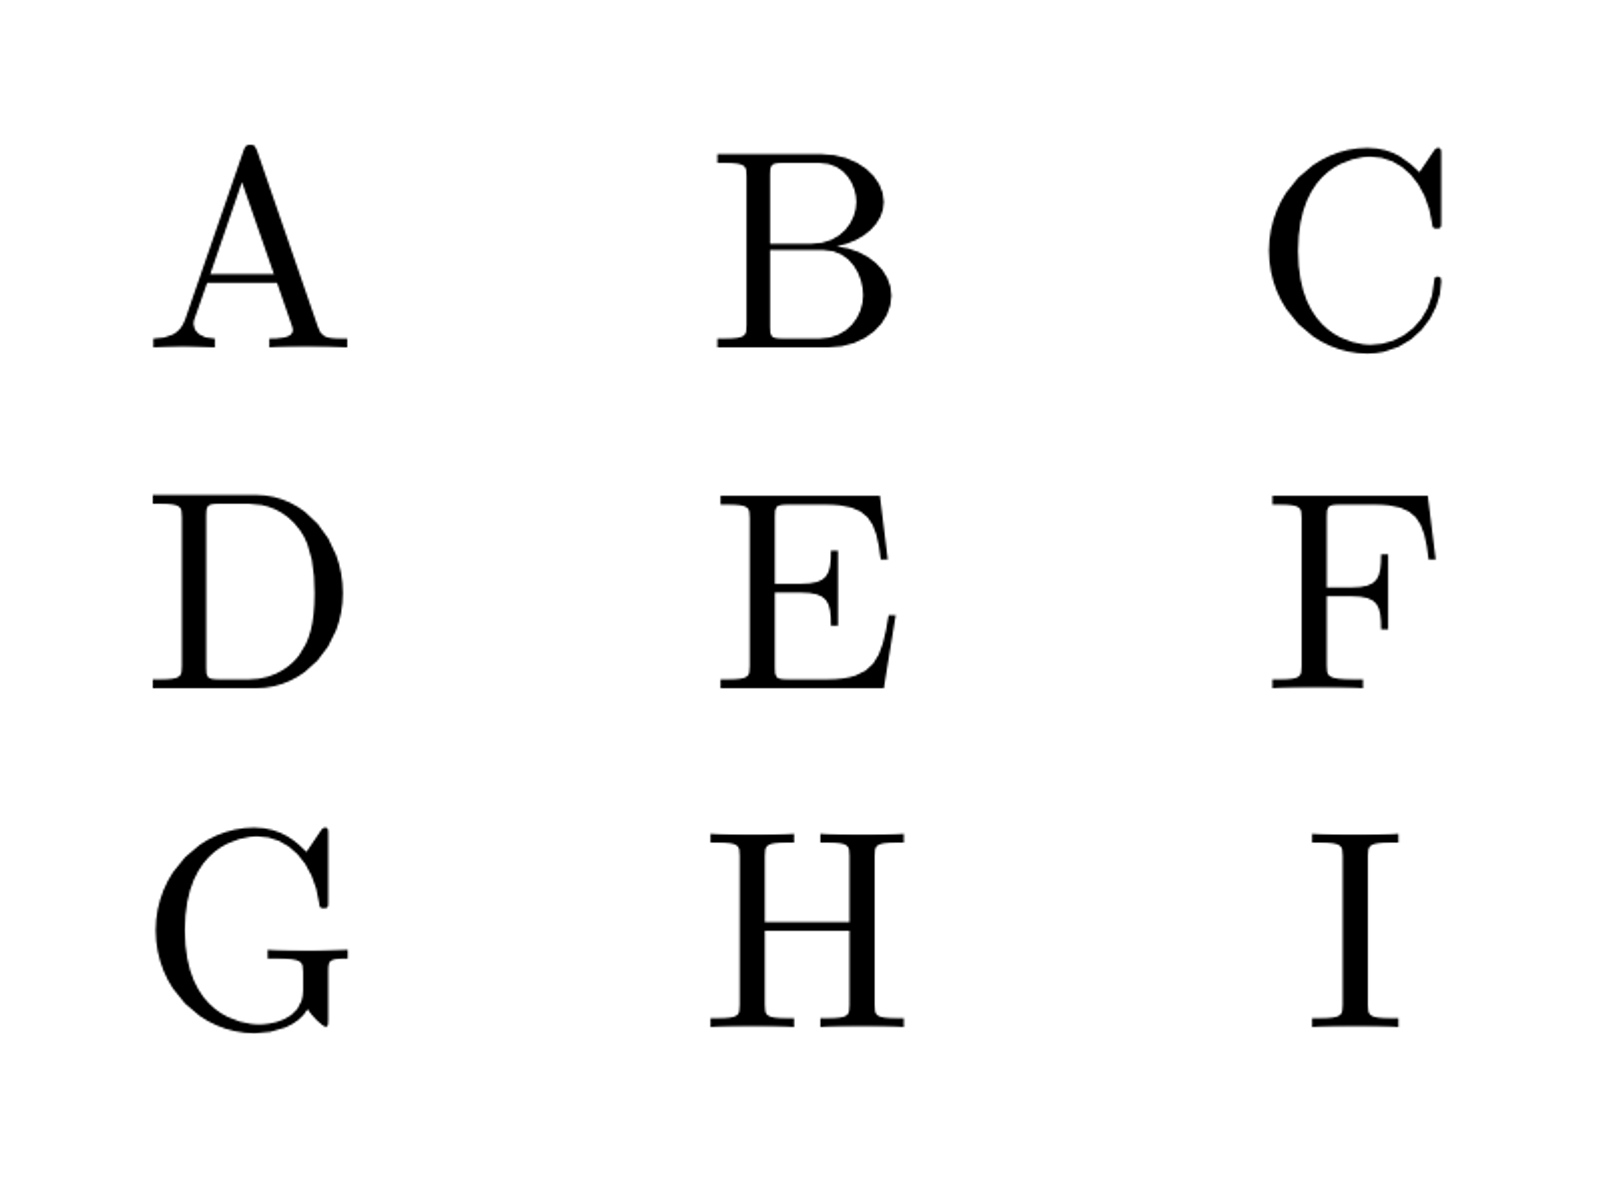
The first thing to notice is how we are adding our content. We use \\ to separate each row, and & to separate the cells inside a row. It’s that simple to add elements to a tabular environment. Now let’s focus on the meaning of the c parameters.
When working in a tabular environment, we need to let LaTeX know how many columns we are working with beforehand. We can represent each column with a special key letter that also specifies the column’s alignment properties. There are three column type for simple entries: l for left-justified, c for centered and r for right-justified. These column types will not be wrapped and the column width will be set by LaTeX to fit to their contents. If the need to add paragraph type entries that might continue into another line, we can use p{<width>} command which wraps the text according to the text width we enter as its parameter.
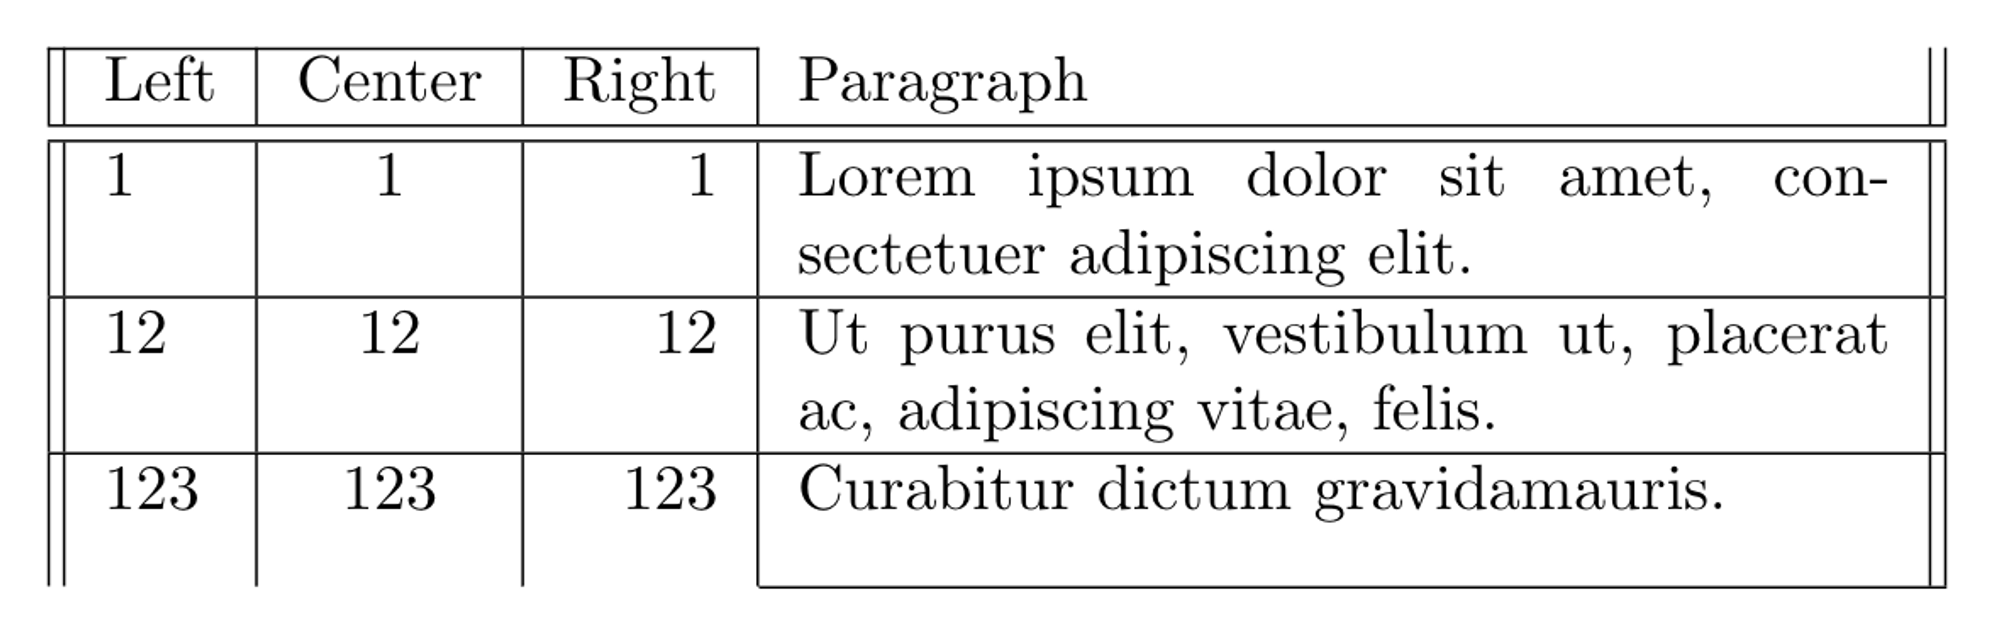
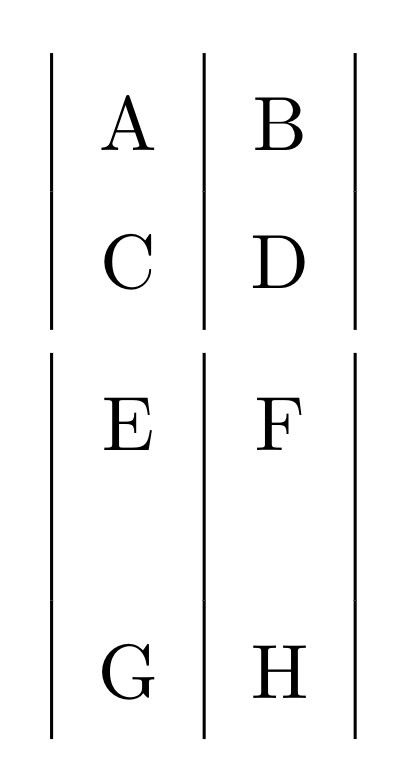
Since we are declaring the vertical features of the table, we can also introduce vertical lines for our table in this process. | creates a vertical line before, after or between columns. If we need a double line, we can use ||. Now let’s use these options to observe their effects. We will add double lines for each vertical end of the table, separate the columns with vertical lines, and represent each alignment option in four columns.
\begin{tabular}{||l|c|r|p{6cm}||}
    Left & Center & Right & Paragraph \\
    1 & 1 & 1 & Lorem ipsum dolor sit amet, consectetuer adipiscing elit. \\
    12 & 12 & 12 & Ut purus elit, vestibulum ut, placerat ac, adipiscing vitae, felis. \\
    123 & 123 & 123 & Curabitur dictum gravidamauris. \\
\end{tabular}

After the declaration of the columns, we can add other elements in the contents of the tabular environment such as lines and new lines in paragraph cells. To add a horizontal line, we can use \hline command. To draw a double line, we can use the command twice. If we only need a horizontal command for some of the columns, there is another command called \cline{c1-c2}, which draws a horizontal line between column c1 and column c2. (The first column is number 1, the second column is number 2, etc.)
If what we need is more horizontal space between lines, we can add a whitespace height option to our \\ commands, such as \\ [1cm]. It should be noted that the whitespace we introduce starts from the end of the first line, so when used with wrapped content, it will not have the same effect on cells with different line count. Additionally, since we are using \\ to separate rows, we can use \newline command to start a new line within a paragraph cell. Below, we added some horizontal lines and a new line to our table.
\begin{tabular}{||l|c|r|p{6cm}||}
    \cline{1-3}
    Left & Center & Right & Paragraph \\
    \hline \hline
    1 & 1 & 1 & Lorem ipsum dolor sit amet, consectetuer adipiscing elit. \\
    \hline
    12 & 12 & 12 & Ut purus elit, vestibulum ut, placerat ac, adipiscing vitae, felis. \\
    \hline
    123 & 123 & 123 & Curabitur dictum gravidamauris. \\ [.3cm]
    \cline{4-4}
\end{tabular}
Aligning Cells
In the basic tabular package, there are no options to align the text in a paragraph column. The array package gives us new aligning and formatting options. The first of these options is the vertical alignment options for paragraph cells.
 p option aligns the top of the paragraph cells with other cells. Array package gives us the m{<width>} option, which will center every entry in proportion to the rest of the line, and the b{<width>} option, which will place every entry aligned with the bottom of the paragraph cell. We demonstrated these options below:
% p for top aligned,
% m for vertically centered,
% b for bottom aligned
\begin{tabular}{|c|p{6cm}|}
    \hline
    Num & Top Aligned Paragraph\\
    \hline
    1 & Lorem ipsum dolor sit amet, consectetuer adipiscing elit. \\
    \hline
    12 & Ut purus elit, vestibulum ut, placerat ac, adipiscing vitae, felis. \\
    \hline
    123 & Curabitur dictum gravidamauris. \\
    \hline
\end{tabular}

If we need to justify the text inside a paragraph cell to the right or center, we can use another feature of the array package: formatting commands. Using >{} before and <{} after the column identifier, we can introduce formatting to the cells. We don’t need to always use both of them at the same time. These commands enable us to change many details about the cells all together as a column. Alignment is one of these changes, we can center our paragraph text by using >{\centering\arraybackslash} command, or we can have right-justified text with >{\raggedleft\arraybackslash} command. (\arraybackslash command helps restore the environment for other cells. It’s not necessary for all formatting commands, but since these alignment commands are changing some definitions, we need to use it.) Below, we showed the effects of alignment commands.
% >{\raggedleft\arraybackslash} for right-justified,
% >{\centering\arraybackslash} for horizontally centered,
% >{\raggedright\arraybackslash} for left-justified
% (by default it's left-justified)
\begin{tabular}{|c|>{\raggedleft\arraybackslash}p{6cm}|}
    \hline
    Num & Top Aligned Paragraph\\
    \hline
    1 & Lorem ipsum dolor sit amet, consectetuer adipiscing elit. \\
    \hline
    12 & Ut purus elit, vestibulum ut, placerat ac, adipiscing vitae, felis. \\
    \hline
    123 & Curabitur dictum gravidamauris. \\
    \hline
\end{tabular}

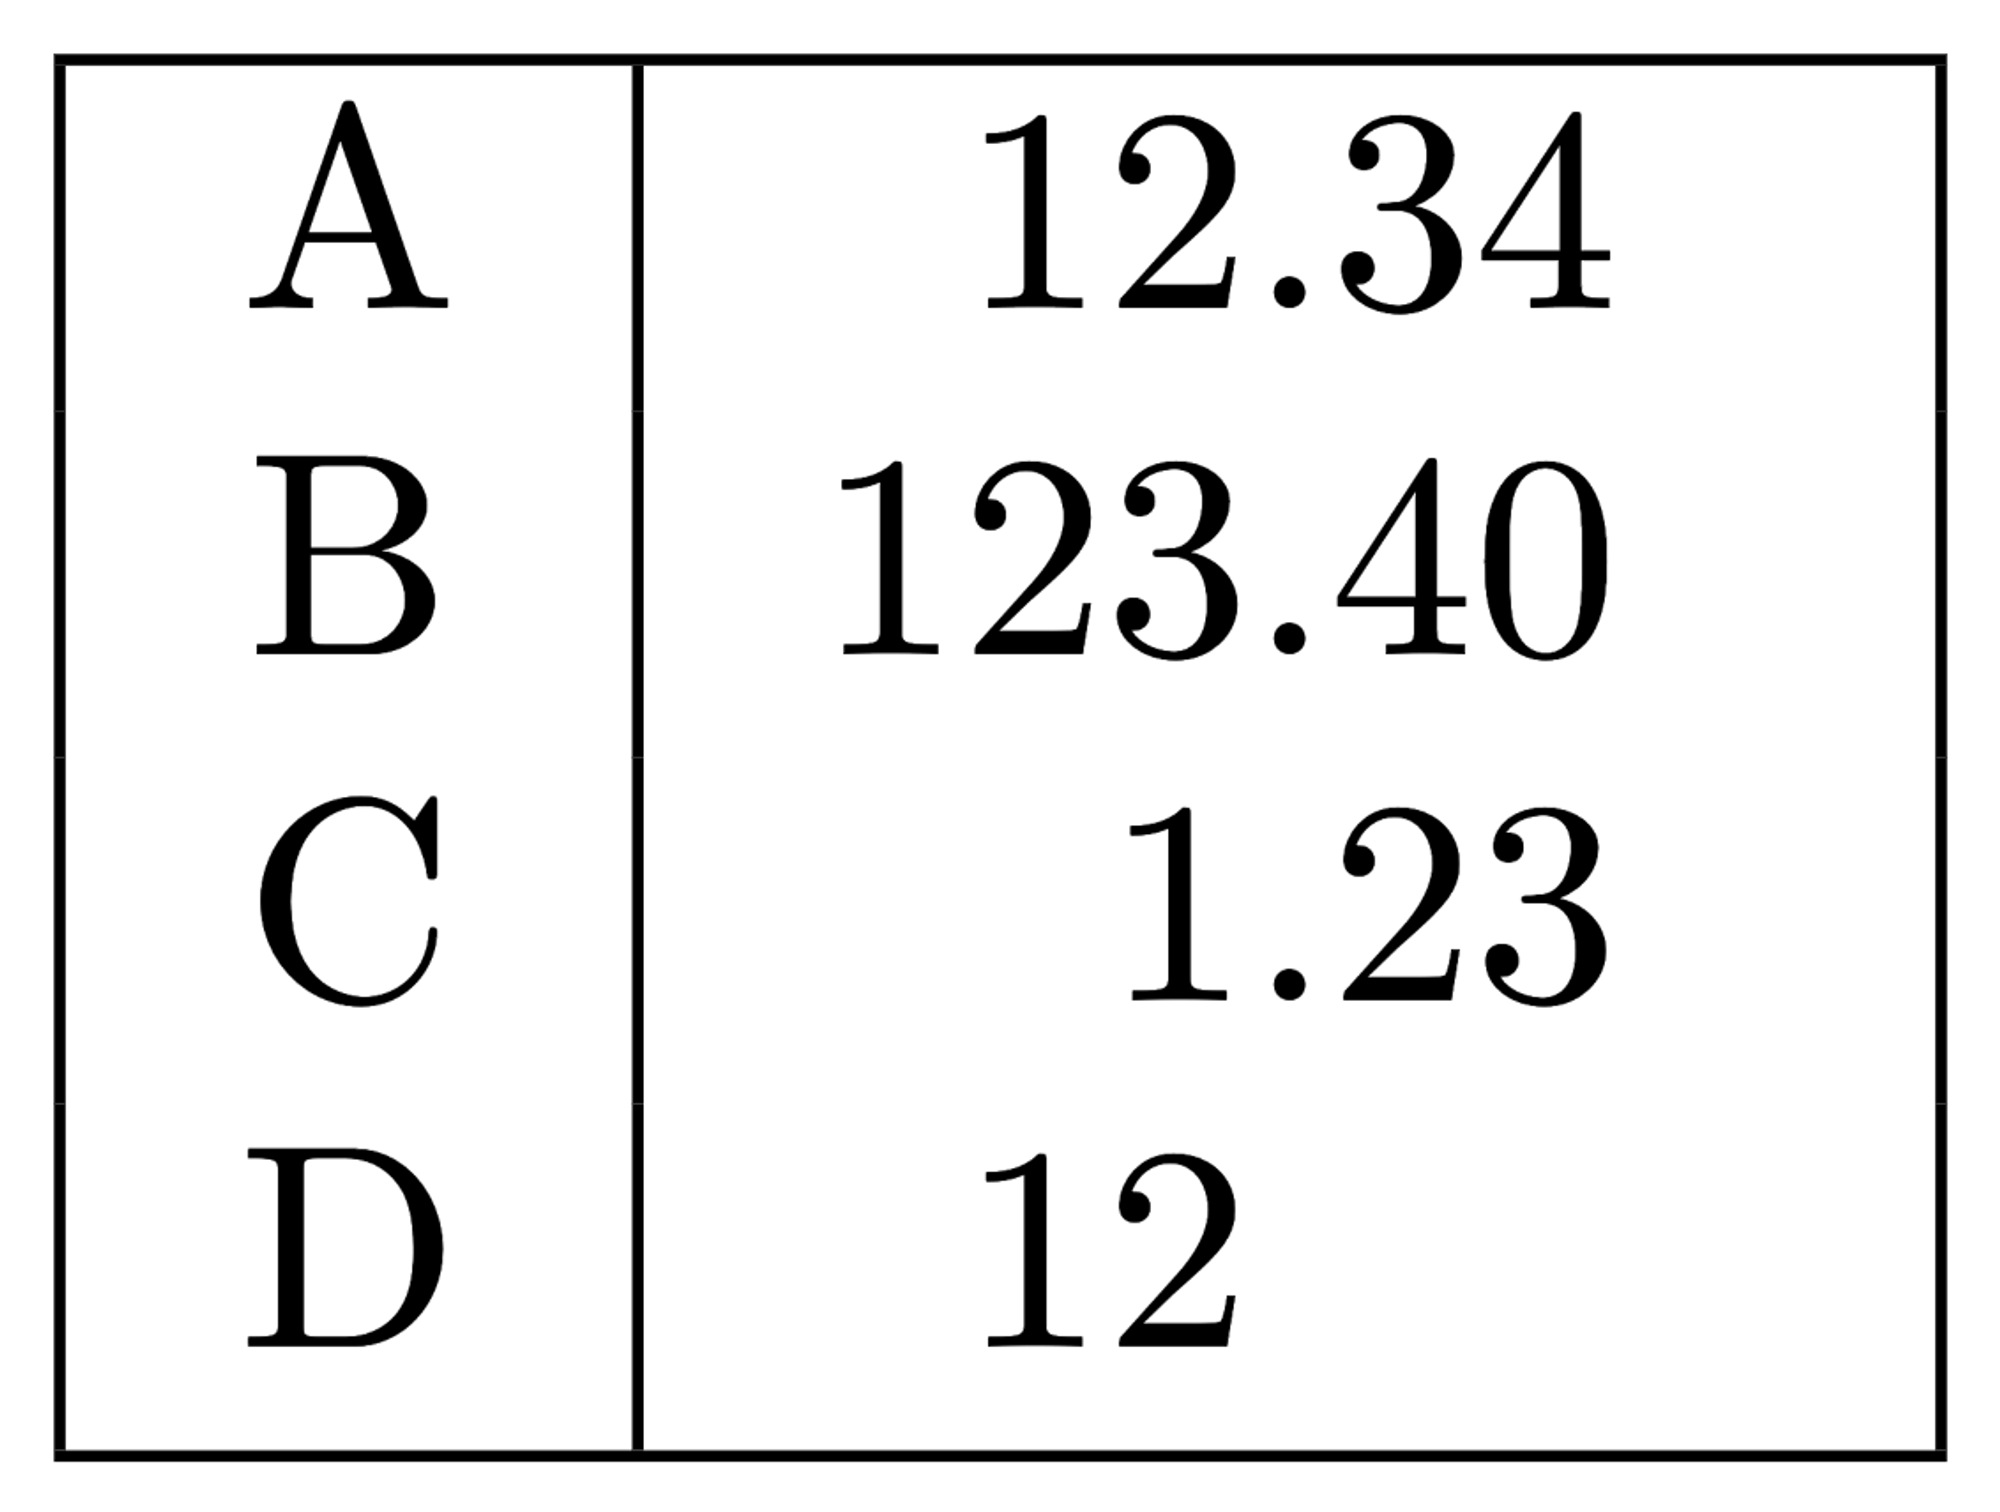
In tables with lots of numerical data, we might need an alignment option that will create a number format and align the decimal points of all numbers. We can have that option with siunitx package. It gives us a way to format numbers with \sisetup command. We can set a round-mode and set the number of digits after the decimal point with round-precision. The package also provides us with a column identifier: S for columns that will have formatted numbers. In the next example, we created a number format that will allow 2 numbers after the decimal point, and also align the numbers according to the decimal point. It will even align the numbers that don’t have a decimal point.
\usepackage{siunitx}
\sisetup{
  round-mode = places, % to round the numbers
  round-precision = 2, % to have two numbers after the decimal point
}
\begin{document}
\begin{tabular}{|c|S|}
    \hline
    A & 12.34 \\
    B & 123.4\\
    C & 1.23456789 \\
    D & 12 \\
    \hline
\end{tabular}
\end{document}
Spacing in Tables
We can alter the spacing between columns and rows. To change the space between columns for the whole table, we can declare a column separation value for tables by using \setlength{\tabcolsep}{<length>} command. The default value is 6pt.
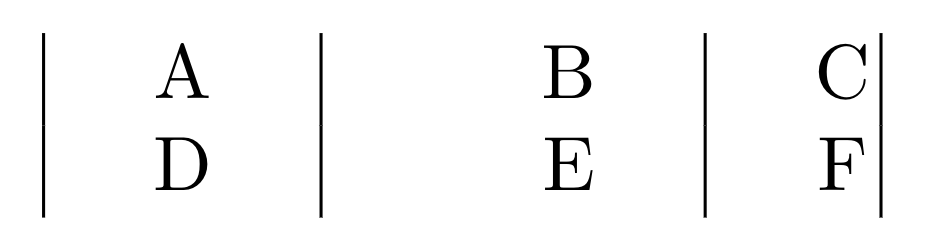
If we only need to change the horizontal spacing for a certain column, we can arrange it in the column declaration with @{\hspace{<length>}} command. We can place the command before or after the column alignment parameter. Below, we build a table with different horizontal spacing choices: We set the regular column spacing to 0.5cm and changed the spacing in the second and third columns by adding @ commands with different lengths.
\setlength{\tabcolsep}{.5cm}
\begin{tabular}{|c|@{\hspace{1cm}}c|c@{\hspace{.05cm}}|}
    A & B & C\\
    D & E & F\\
\end{tabular}
To adjust the spacing between each row, we can change the value of the arraystretch variable: \renewcommand{\arraystretch}{<length>}. The default value is 1.0.
We can also add a small skip after a row break using \noalign{\smallskip} command. This will break the horizontal borders in the table; if this is not wanted, the skip value can be specified in brackets [<length>]. In the following example, we used all three options with various length values.
\renewcommand{\arraystretch}{1.5}
\begin{tabular}{|c|c|c|}
    A & B\\
    C & D\\\noalign{\smallskip}
    E & F\\[.5cm]
    G & H\\
\end{tabular}
Colors in Tables
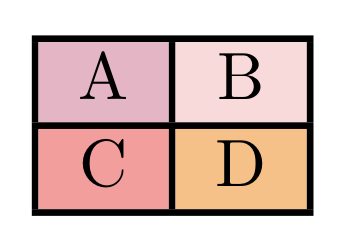
We need xcolor package with the table option to introduce colors to our tables, we can add it with \usepackage[table]{xcolor} command. To add color only to a single cell, there is a \cellcolor{<color>} command, which needs to be placed in the cell. Below, we changed the colors of some cells.
\usepackage[table]{xcolor}
% ...
\begin{tabular}{|c|c|}
    \hline
    \cellcolor{purple!30}A & \cellcolor{pink!60}B \\
    \hline
    \cellcolor{red!40}C & \cellcolor{orange!50}D \\
    \hline
\end{tabular}
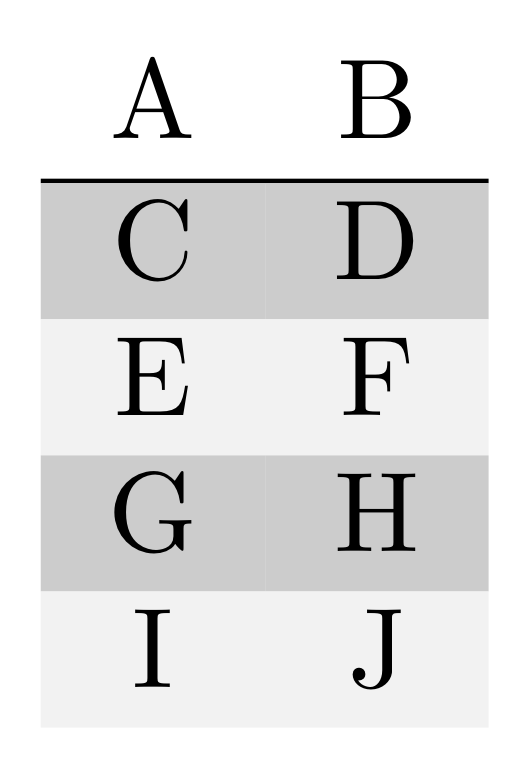
A common way to color tables is to use alternating row colors to make the each row easy to follow. To enable this option, we can use \rowcolors{<starting row>}{<odd color>}{<even color>} command. The first row has the number 1. In the next piece of code, we used a lighter and darker version of gray to create alternating row colors that is starting from the second row.
\usepackage[table]{xcolor}
% ...
\rowcolors{2}{gray!10}{gray!40}
\begin{tabular}{cc}
    A & B \\
    \hline
    C & D \\
    E & F \\
    G & H \\
    I & J \\
\end{tabular}
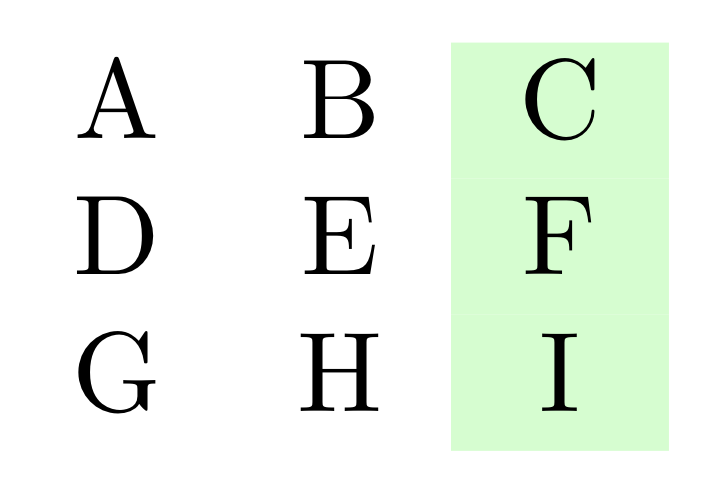
If we want to color columns instead of rows, we can do this with the >{\columncolor{<color>}} command at the point before we set the alignment settings. Below, we set the final column to have a green tone.
\usepackage[table]{xcolor}
% ...
\begin{tabular}{cc >{\columncolor{green!20}}c}
    A & B & C \\
    D & E & F \\
    G & H & I \\
\end{tabular}
Changing Line Widths
Changing the widths of every border and rule in LaTeX can be achieved with the command: \setlength{\arrayrulewidth}{<width>}. The default line thickness is 0.4pt. We can include xcolor package with table option in our document to avoid uneven corners where \hline and column separators cross. In the next example, we amplified the borders by setting the \arrayrulewidth to 1.5pt.
\usepackage[table]{xcolor}
% ...
\setlength{\arrayrulewidth}{1.5pt}
\begin{tabular}{|c|c|c|}
    \hline
    A & B & C \\
    \hline
    D & E & F \\
    \hline
    G & H & I \\
    \hline
\end{tabular}

A Better Look with Booktabs
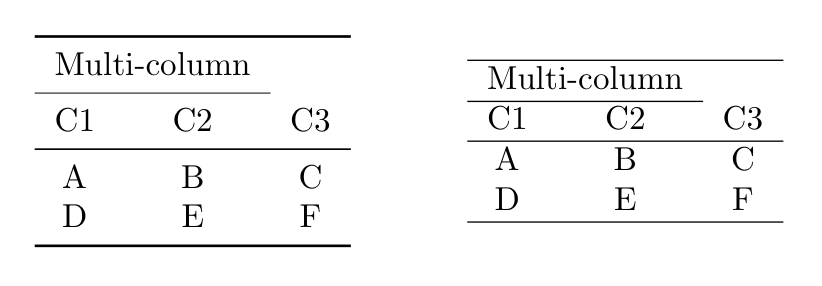
LaTeX has lots of options to make typesetting professional-looking tables easy. One of the most used packages for a better look in a table is the booktabs package. Basically, it has different line width and spacing settings for different borders of a table: \toprule for the uppermost line, \bottomrule for the lowermost line and \midrule or \cmidrule{c1-c2} (which draws the rule between columns c1 and c2) for any required lines in-between. These rules have better spacing options to create a more spread out look that helps following the table without adding any vertical lines. In the following piece of code, we used booktabs commands to create a more professional looking table. Additionally, we compared it to a table created with \hline and \cline{} commands in the figure.
\begin{tabular}{ccc}
    \toprule
    \multicolumn{2}{c}{Multi-column} & \\
    \cmidrule{1-2}
    C1 & C2 & C3 \\
    \midrule
    A & B & C \\
    D & E & F \\
    \bottomrule
\end{tabular}
Multi-Row and Multi-Column Cells
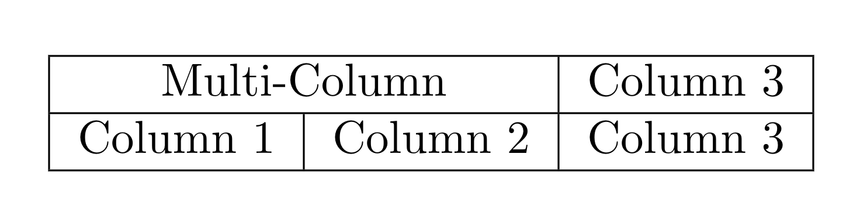
We can declare a multi-column cell easily with a \multicolumn command. It needs three parameters: \multicolumn{<number of columns>}{<alignment>}{<text>}. It’s important to take into account that the alignment parameter must also include the possible borders for that cell. Below, we merged two cells in a row and centered its text in a three-columned and bordered table: we used 2 for number of columns and |c| for centering the text and adding the borders.
\begin{tabular}{|l|l|l|}
    \hline
    \multicolumn{2}{|c|}{Multi-Column} & Column 3 \\
    \hline
    Column 1 & Column 2 & Column 3 \\
    \hline
\end{tabular}
There is not a native command for multi-row cells in LaTeX, we need to use the multirow package to add it. This command also takes three parameters: \multirow{<number of rows>}{<width>}{text}. If we want to use the natural width of the text as width, we can use * for the width parameter. Additionally, we need to left the space for the other cells in the multi-row layout empty. Like the multicolumn command, we need to arrange the borders around the multi-row column. A \hline will go over a multi-row cell. However, we can utilize \cline command to only put borders between regular cells. Below, we merged two cells in a column with their own natural width.
\begin{tabular}{|l|l|}
    \hline
    \multirow{2}{*}{Multi-Row} & Row 1 \\
    \cline{2-2}
    & Row 2 \\
    \hline
    Row 3 & Row 3 \\
    \hline
\end{tabular}

If we need both of them, we need to use declare an empty multi-column for each of the rows after the multirow declaration. In the next example, we merged four cells, both as multi-row and multi-column, with its natural width and centered text.
\begin{tabular}{|l|l|l|}
    \hline
    \multicolumn{2}{|c|}{\multirow{2}{*}{Multi-Row and Col}} & C1 \\
    \cline{3-3}
    \multicolumn{2}{|c|}{} & C2 \\
    \hline
    A3 & B3 & C3 \\
    \hline
\end{tabular}
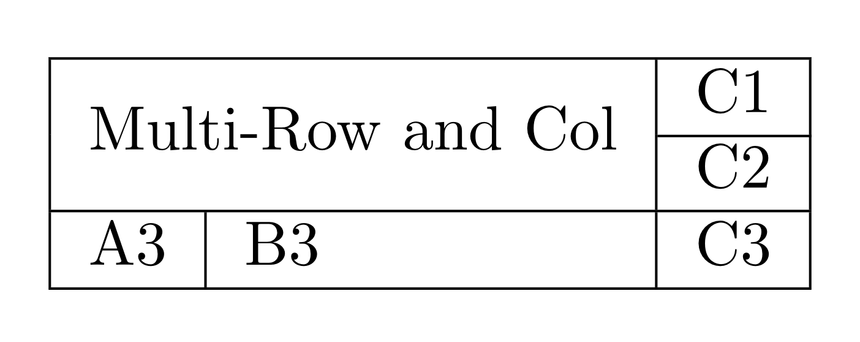
Table Environment
Tables in LaTeX often encapsulated in a table environment, which is one of the float environments. Floats are handled differently than text elements, they cannot be broken across pages and there are certain options to place a float. In professional documents, figures and tables are often used with additional spacing and a caption—they are placed on a page that doesn’t include any text, or if they are small enough, they are placed on the top or bottom parts of a text page. Floats are designed to work similarly to this setting, they have placement specifier parameters to place the element in the best possible position. Below, we included the possible placement options in the table environment.
| Specifier | Placement |
|---|---|
| t | Place the table at the top of a text page |
| b | Place the table at the bottom of a text page |
| h | Place the table at the position in the text where the table environment is (since it cannot be used alone, it automatically adds the t option) |
| p | Place the table on a separate float page |
| ! | Used in addition to the other parameters, it overrides the restrictions of LaTeX over the floats (such as the maximum number of floats on a page) and helps to enforce the chosen parameter |
| H | Comes with the float package, it absolutely forces the table to appear at the position in the text where the table environment is |
The default placement parameter is tbp, which means LaTeX will try to place the table to the top or the bottom part of the page, or it will place it on a separate float page. The order of the parameters is not important, it only means that LaTeX will try to place the table in one of the positions that are included in the parameter, and will not try the excluded ones.
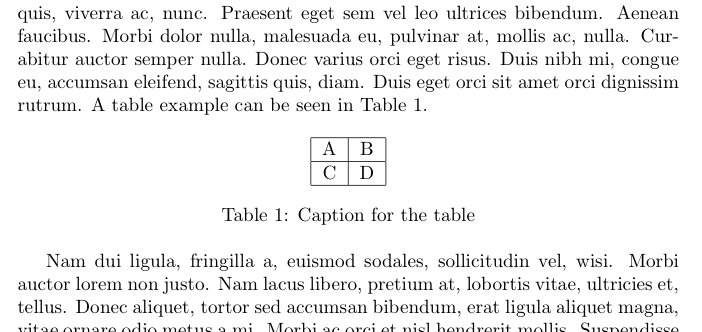
Usually, in a table environment, a tabular environment is used with a caption and a label. The label can be used to add a reference to the table in text with \ref{<label>} command. For example, the table below can be referenced in-text using \ref{table-example}.
% ...
A table example can be seen in Table \ref{table-example}.
\begin{table}[ht]
\centering
\begin{tabular}{|c|c|}
    \hline
    A & B\\
    \hline
    C & D\\
    \hline
\end{tabular}
\caption{Caption for the table}
\label{table-example}
\end{table}
Changing Table Size
Setting a table with the possible alignment options for each column can sometimes result in tables that is larger than the maximum width for the text or the page. If an element is too wide to fit the horizontal space on the page and LaTeX couldn’t find a way to break it apart, it will give an “Overfull \hbox …” warning. We can avoid it by controlling the size of the element to be within the maximum text width.
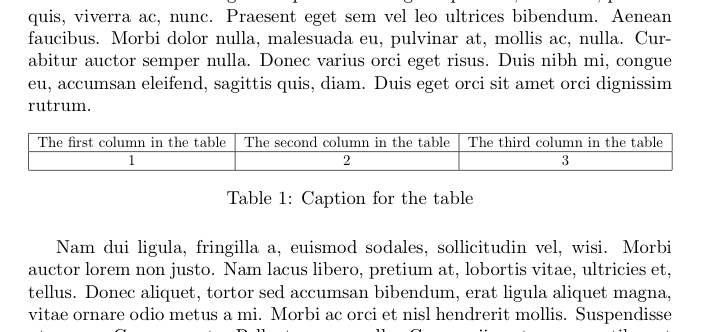
We can scale the table as a whole using the graphicx package—it features the command \resizebox{<width>}{<height>}{<content>}. To maintain the original width-height ratio, we can set one of the parameters and use ! for the other one. In the following example, we scaled down a table using \textwidth as the width parameter and ! as the height parameter.
\usepackage{graphicx}
% ...
\begin{table}[h]
\resizebox{\textwidth}{!}{\begin{tabular}{|c|c|c|}
    \hline
    The first column in the table & The second column in the table & The third column in the table\\
    \hline
    1 & 2 & 3\\
    \hline
\end{tabular}}
\caption{Caption for the table}
\label{table-example}
\end{table}
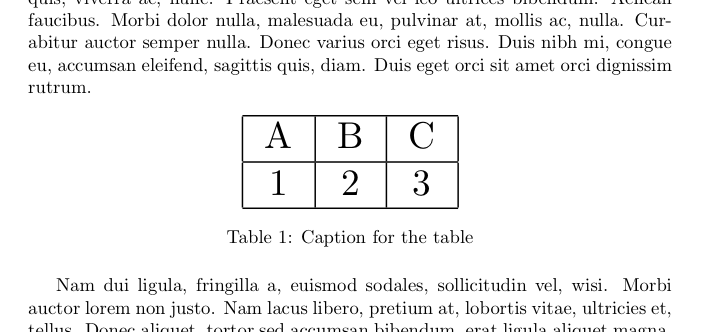
The second option in the graphicx package is the \scalebox{<ratio>}{<content>} command, that locks the width-height ratio and then lets us scale the table from its initial size. For example, following piece of code creates a table twice the size of its initial dimensions.
\usepackage{graphicx}
% ...
\begin{table}[h]
\centering
\scalebox{2}{\begin{tabular}{|c|c|c|}
    \hline
    A & B & C\\
    \hline
    1 & 2 & 3\\
    \hline
\end{tabular}}
\caption{Caption for the table}
\label{table-example}
\end{table}
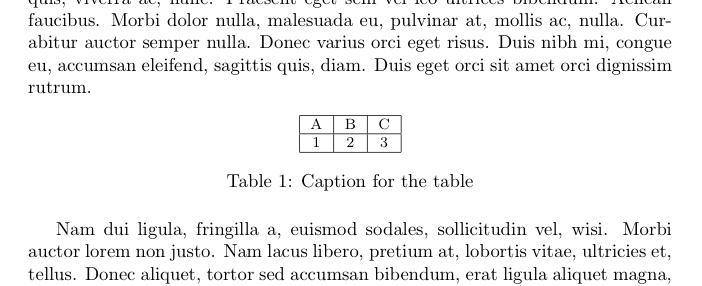
It should be noted that using these options will scale the text inside, so we will end up with a different text size than the whole document. If we want to change the size of the table by controlling the font size, we can set the tabular environment inside a font size scope. Following piece of code creates a table in \footnotesize.
\begin{table}[h]
\centering
\footnotesize{\begin{tabular}{|c|c|c|}
    \hline
    A & B & C\\
    \hline
    1 & 2 & 3\\
    \hline
\end{tabular}}
\caption{Caption for the table}
\label{table-example}
\end{table}
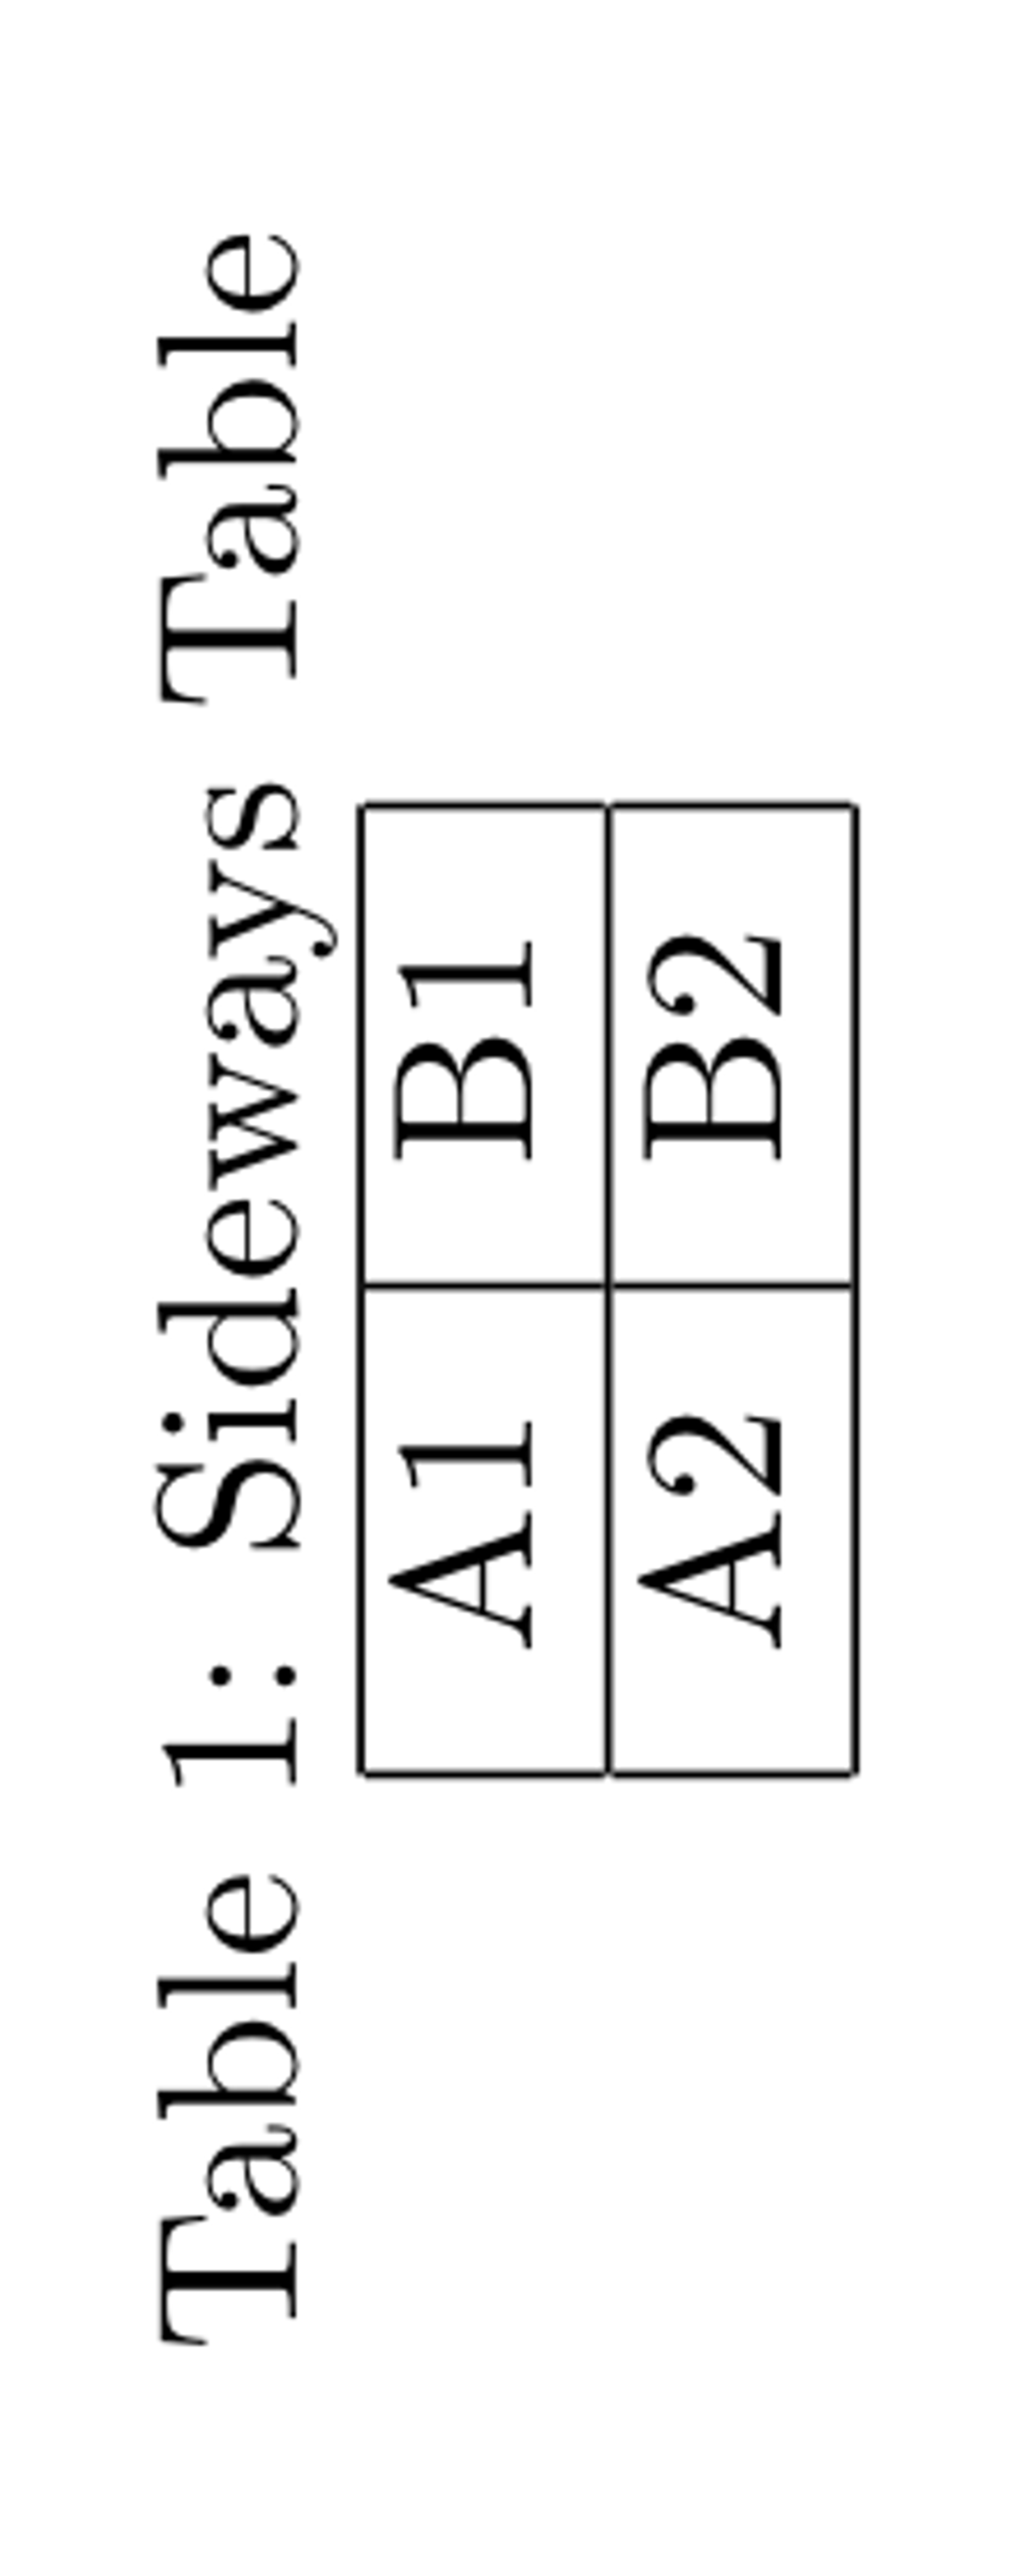
Sideways Tables
We can handle sideways tables with the rotating package. It comes with a float environment called sidewaystable, which will build the table in a landscape layout. By default, it will rotate the table clockwise, but we can change it by adding counterclockwise option to the usepackage declaration. In the next piece of code, we declared a sideways table.
\begin{sidewaystable}
\centering
\caption{Sideways Table}
\begin{tabular}{|l|l|}
\hline
A1 & B1 \\
\hline
A2 & B2 \\
\hline
\end{tabular}
\end{sidewaystable}
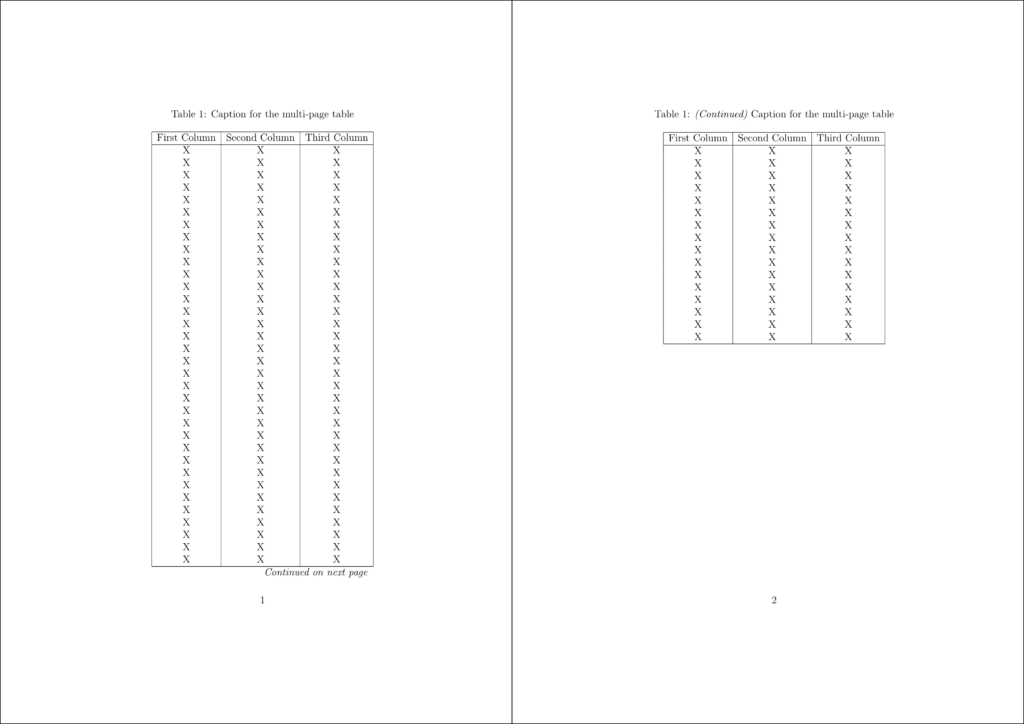
Multi-Page Tables
When our table cannot fit into one page, we can use the longtable package. It replaces both tabular and table environments. In a multi-page table, there might be some elements that needs placing on each page or only the first/last page. For instance, we can place the head row of the table on every page, or a reminder that declares the table continues in the next page can be placed every page other than the last page. In the longtable environment, there are additional commands to declare these settings:
\endfirsthead: All the lines before this command will be placed as the head on the first page\endhead: All the lines before this command will be placed as the head on every page other than the first page\endfoot: All the lines before this command will be placed as the foot on every page other than the last page\endlastfoot: All the lines before this command will be placed as the foot on the last page
All the content of the table goes after these commands. Below, we created a multi-page table with these four commands. Notice that we don’t need to encapsulate the longtable with a table environment—it will still be counted as a table by LaTeX and it will be included in the \listoftables.
\usepackage{longtable}
% ...
\begin{longtable}{|c|c|c|}
\caption{Caption for the multi-page table}\\
\hline
First Column & Second Column & Third Column \\
\hline
\endfirsthead
\caption{\textit{(Continued)} Caption for the multi-page table}\\
\hline
First Column & Second Column & Third Column \\
\hline
\endhead
\hline
\multicolumn{3}{r}{\textit{Continued on next page}} \\
\endfoot
\hline
\endlastfoot
X & X & X \\ X & X & X \\ X & X & X \\ X & X & X \\ X & X & X \\
X & X & X \\ X & X & X \\ X & X & X \\ X & X & X \\ X & X & X \\
X & X & X \\ X & X & X \\ X & X & X \\ X & X & X \\ X & X & X \\
X & X & X \\ X & X & X \\ X & X & X \\ X & X & X \\ X & X & X \\
X & X & X \\ X & X & X \\ X & X & X \\ X & X & X \\ X & X & X \\
X & X & X \\ X & X & X \\ X & X & X \\ X & X & X \\ X & X & X \\
X & X & X \\ X & X & X \\ X & X & X \\ X & X & X \\ X & X & X \\
X & X & X \\ X & X & X \\ X & X & X \\ X & X & X \\ X & X & X \\
X & X & X \\ X & X & X \\ X & X & X \\ X & X & X \\ X & X & X \\
X & X & X \\ X & X & X \\ X & X & X \\ X & X & X \\ X & X & X \\
\end{longtable}
Summary
- In LaTeX, tables are typed in tabular environment. A simple table with two centered columns with a separator line between them can be created with
\begin{tabular}{c|c} a & b \\ c & d \\ \end{tabular}command. - Columns are separated with
&symbol and a new row can be declared with\\command. - The standard column alignment options are
cfor centered text,lfor left-aligned,rfor right-aligned andp{<width>}for paragraphs. - To draw horizontal lines between rows, we can use
\hlineor\cline{c1-c2}for drawing a line between c1 and c2 columns of the table. - With array package, we can additionally set the vertical alignment of the cells, or with siunitx package, we can align numbers at the decimal point. For more information, take a look at the Aligning Cells section.
- To change the spacing defaults for the tabular environment, we need to change \tabcolsep and \arraystrecth variables. For more information, take a look at Spacing in Tables section.
- xcolor package let us change the coloring settings of tables when used with
tableoption. We can set alternating row colors or change the color of a column. Additionally, we can change individual cell colors. For more information, have a look at Colors in Tables section. - The default line width of table borders are set in
\arrayrulewidthvariable. To learn more, check Changing Line Widths section. - Booktabs package is a popular table tool to create beautiful tables that has better spacing and line width settings. To explore the booktabs package, check A Better Look with Booktabs section.
- Merging column cells can be achieved with the command:
\multicolumn. Multirow package allows us to merge cells in both directions. For more information, have a look at Multi-Row and Multi-Column Cells section. - Encapsulating tabular environment between
\begin{table}and\end{table}commands makes it a float object in table environment, which can be used to better place the table on the page layout. For more information, take a look at Table Environment section. - In-text references to labelled tables (
\label) are created with\refcommand. - With graphicx package, we can resize tables using two commands:
\resizebox{<width>}{<height>}{<content>}and\scalebox{<ratio>}{<content>}. For more information, check Changing Table Size section. - rotating package enables us to use sidewaystable environment to print rotated tables. To learn more, have a look at Sideways Tables section.
- We can create multi-page tables using longtable package. More information is found in Multi-Page Tables section.