In this series of tutorials, we are going to see a powerful tool to easily write exams in LaTeX: exam document class . This document class, which comes in the form of an external package, was written by Philip Hirschhorn, from Wellesley College and is meant to provide several tools to write exams using LaTeX, so that even novice users of the system can easily prepare exams.
The capabilities of the package range from the simple adaptation of the page layout, to make the exam easier to read, to the creation of grading tables, passing through different ways to write multiple-choice questions, questions with a blank space left for the answer, questions with parts and subparts, and many other things.
In this first tutorial, we will briefly explain the main aspects of the document class, together with some examples, so that you can quickly start writing your own exams. In later parts, we will explain in more detail the capabilities of the package, explaining different topics regarding the process of writing an exam.
1. Loading the document class
Using the exam document class is the same as using any other LaTeX class: you have to write \documentclass{exam} at the beginning of your preamble. However, there is a slight difference, since this document class admits two new optional arguments (besides the usual options that LaTeX’s document classes admit, e.g., to select the font size).
- The first one is the addpoints option, which enables the commands that add up the points and that produce grading tables (which we will explain in later tutorials). Most of the time, you want this option to be enabled in the exams you typeset, but it is not the default for the sake of maintaining backward compatibility. You can also turn the addpoints option on and off wherever you like in the exam by using the commands \addpoints and \noaddpoints.
- The other extra option provided is answers. This option determines whether the answers should be typeset or not when you compile the document. When we explain the specific commands used to typeset the answers, you will see which is the effect of this command in each specific case.
2. Asking for the student’s name
Probably you want to know who answers the exam you are writing, so before asking any other question you will ask first who is the author of the solutions. Unfortunately, the exam document class doesn’t provide an environment to ask for the student’s name or give any instructions before starting the exam; you have to typeset it manually. However, the package does provide some commands to leave empty space for answers, which can also be applied in this case.
Solution
In the following example, we present a simple solution to do so; you can use it as a starting point and modify it in the way that better suits you.
% Exam package: Instructions & student name

\documentclass{exam}

\begin{document}

\begin{center}
\fbox{\fbox{\parbox{5.5in}{\centering
            \textbf{Read carefully before starting the test:}
            \begin{itemize}
                \item Answer the questions using
                    a blue or black pen.
                \item You can't use any electronic device.
            \end{itemize}}}}

\vspace{0.1in}
\end{center}

\makebox[\textwidth]{\textsc{Full name:}\enspace\hrulefill}

\vspace{0.2in}

\makebox[\textwidth]{\textsc{ID:}\enspace\hrulefill}

\end{document}
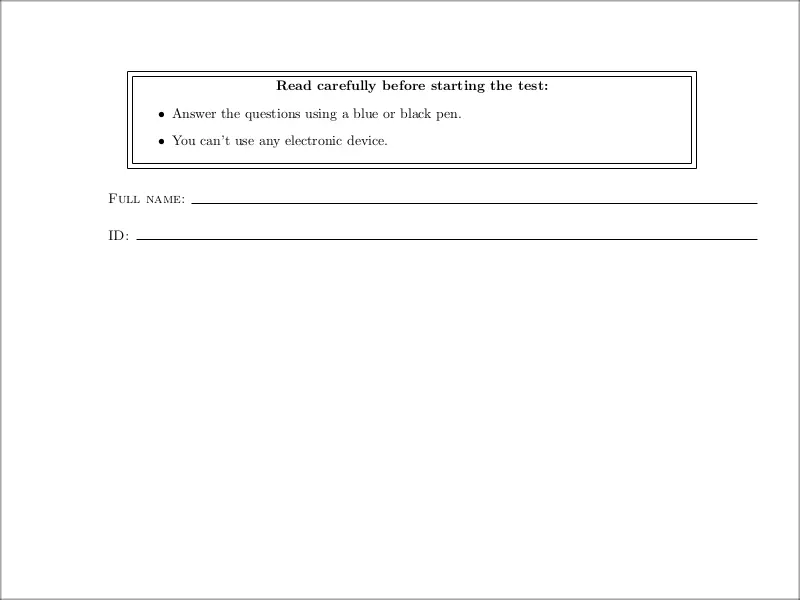
You can see the output this produces in the following image. You may note that there are macros in the previous example that you don’t recognize from plain LaTeX; that’s because they are newly defined by the exam package. In a later tutorial, we will explain these macros to leave blank space for answers in detail.
3. Typeset questions in LaTeX
Once we have asked for the student’s name and ID and given the proper instructions to carry out the exam, we can start asking questions.
One simple way to do that is using the questions environment. Once inside this environment, each question is asked with the \question command, which is optionally followed by a number of points inside of square brackets.
Let’s see a minimal example of how to do that:
% Typeset questions in LaTeX

\documentclass{exam}

\begin{document}

\begin{questions}

    \question[1] What is the meaning of life?
    \question[2] How big is the universe?
    \question[5]
    Using the previous two answers, compute
    \[
        \int_{-\infty}^{\infty} e^{-x^2}\;dx.
    \]
\end{questions}

\end{document}
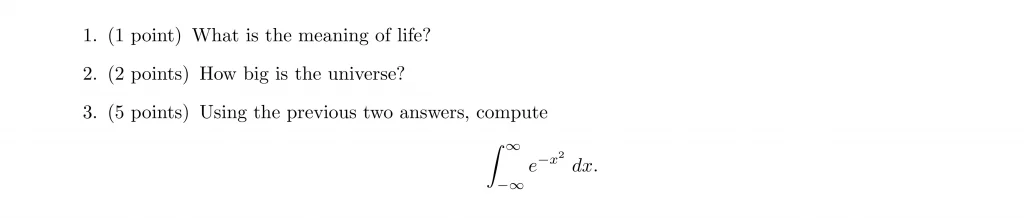
The questions produced in this example are shown below. Note how the points each question is worth are indicated; in later tutorials, we will see how to change their appearance but as a small sneak peak let me mention that you can insert the command \marksnotpoints in the environment, and the words “point” and “points” will be replaced by the words “mark” and “marks”.
Note also that, once we write the \question command, we can use several lines, and everything we write will be used for that very same question until a new \question command appears (or unit the questions environment ends).
4. Typeset exam papers with parts
Most of the time exams include questions that consist, in turn, of several smaller questions, or parts. The exam document class provides support for that kind of question through the “parts” environment. Inside this environment, you can use the \part macro to create a new part for the question.
Similarly, there are the subparts and subsubparts environments, that work essentially in the same way, and enable us to further divide a part question into subpart and subsubpart questions.
The following is an example of a question with some parts and subparts:
% Typeset exam with parts

\documentclass{exam}

\begin{document}

\begin{questions}

    \marksnotpoints
    \question[50] What is the meaning of life?
    \begin{parts}
        \part[25] Do we really exist?
        \part[25] Suppose that we actually exist, then:
        \begin{subparts}
            \subpart[10] Is the meaning of life well
            defined?
            \subpart[15] Using the previous question, are
            you alive?
        \end{subparts}
    \end{parts}
\end{questions}

\end{document}
You can see how the question with parts looks in the following image:
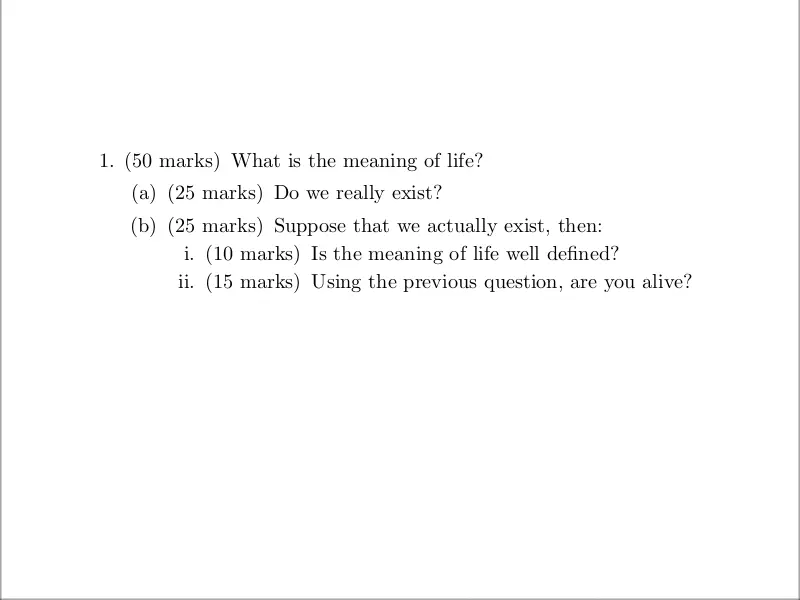
As you can see, the environments to make parts of a question work essentially in the same way as the questions environment itself: you can assign points to every part question, and a new part question only starts when the command \part (or equivalent) is used.
If a question already begins with a parts environment, then the first part will appear on the same line as the question number (as we will see in a later example).
5. Leaving space for answers
To leave blank space after the question, so that the student has some room to answer it, we can use the \vspace command, that already comes with plain LaTeX. We can also end a page using the built-in \newpage command.
Although this may seem too simple, there are more sophisticated layouts we can produce to leave space for
answers. For example, if you want to equally distribute the space on a page among several questions (or parts, or subparts, or subsubparts), you should use \vspace{\stretch{1}} after each of the questions (or parts of questions) and end the page with \newpage.
If this last part sounded a bit confusing, here is a minimal example to clarify this:
% Spacing for answers in LaTeX

\documentclass{exam}

\begin{document}

\begin{questions}

    \question[10] Some short question.
    \vspace{\stretch{1}}

    \question[20] Leave twice the space of the previous
    question.
    \vspace{\stretch{2}}

    \question[20]
    \begin{parts}
        \part[10] Half of the common space here.
        \vspace{\stretch{0.5}}
        \part[10] And 0.75 the base space here.
        \vspace{\stretch{0.75}}
    \end{parts}
\end{questions}
\newpage

\end{document}
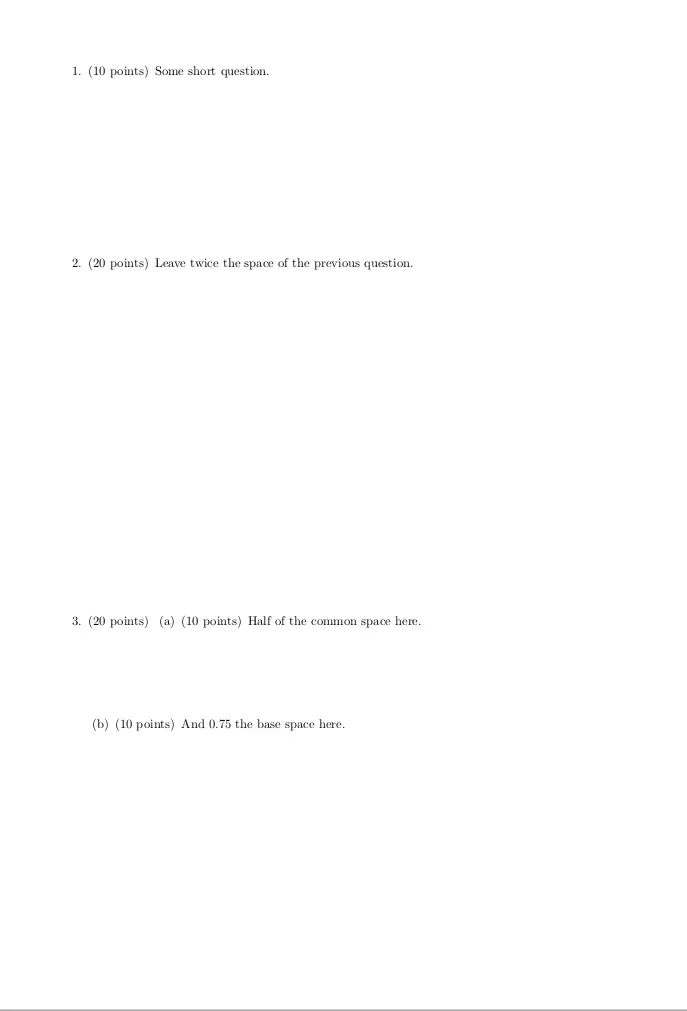
You can see the different spacing left for the answers below:
In addition to leaving blank space, it’s also possible to leave lined space, dotted lined space, space printed with a grid, or an empty box. But to see this we will have to wait until later tutorials.
6. Headers and footers
To conclude this introductory tutorial, we will briefly see the possibilities that exam offers regarding the customization of headers and footers.
To produce an exam with headers and footers, you have to pass the command: \pagestyle{headandfoot} in the preamble, followed by the commands that say what will be in the headers and footers.
As usual, headers and footers each have three parts:
- one part on the left,
- one centered part, and
- one part on the right;
These are determined, on the first page, by the commands:
- \firstpageheader: for the header on the first page,
- \firstpagefooter: for the footer on the first page,
- \firstpageheadrule: to put a horizontal rule in the head of the first page,
- \ristpagefootrule: to put a horizontal rule in the foot of the first page.
And in the following pages, the headers and footers are specified by the analogous commands: \runningheader, \runningfooter, \runningheadrule, and \runningfootrule. For each of the four commands that specify headers or footers, the different parts of the header or footer are passed to three mandatory arguments, any of which can be left empty.
Example 01:
To better understand all of this, let’s look at a couple of examples:
% Add header and footer to Exam (assignment) papers
\documentclass{exam}

\usepackage{lipsum}

\pagestyle{headandfoot}

\runningheader{Ancient History}{Exam 2}{September 8,1998}
\runningheadrule
\runningfooter{}{Page \thepage\ of \numpages}{}

\begin{document}

\lipsum[0]
\newpage

\lipsum[1]
\newpage

\lipsum[2]
\newpage

\end{document}
You can see the output of the second page of this first
example below:
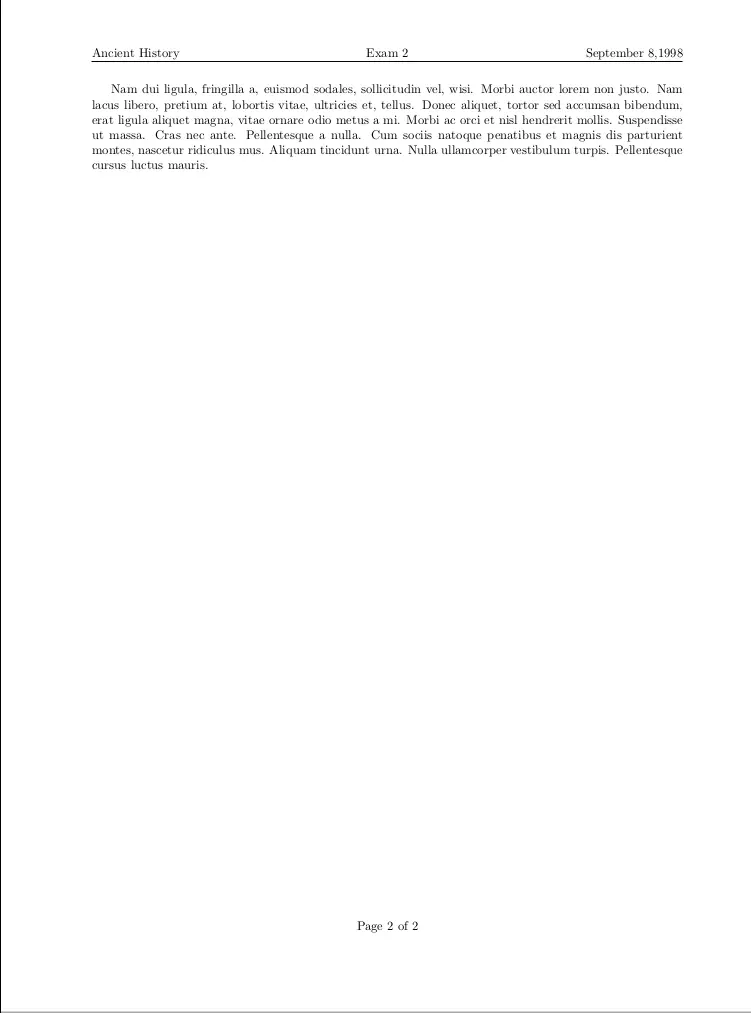
- In this case, we have only customized the headers and footers of the running pages and not the ones from the first page. You can ignore the lipsum package that we loaded: it is only used to generate dummy text.
- After that, we set a header for the running pages, followed by a rule, and also a footer.
Note that in the footer we used the commands \thepage and \numpages. These are very useful when designing headers and footers:
- the first one typesets the number of the current page, while
- the second one typesets the total number of pages in the document.
Example 02:
This second example is a bit more sophisticated, but the idea behind it is the same as before.
% Custom header and footer in Exam document
\documentclass{exam}
\usepackage{lipsum}
\pagestyle{headandfoot}
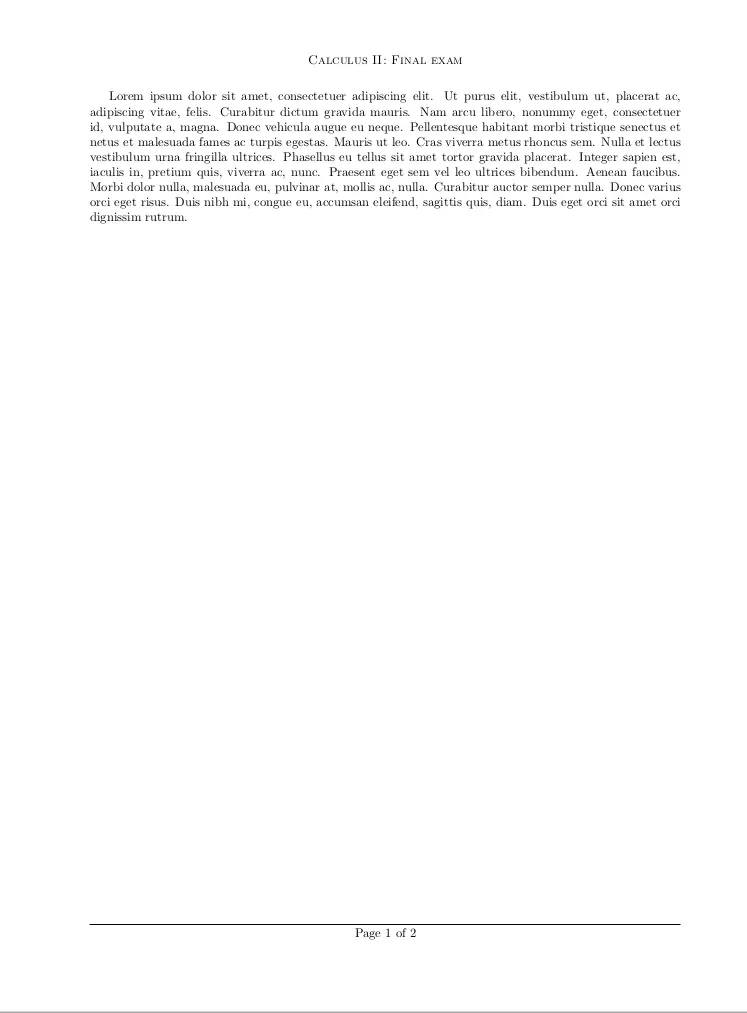
\firstpageheader{}{\sc Calculus II: Final exam}{}
\firstpagefootrule
\firstpagefooter{}{Page \thepage\ of \numpages}{}
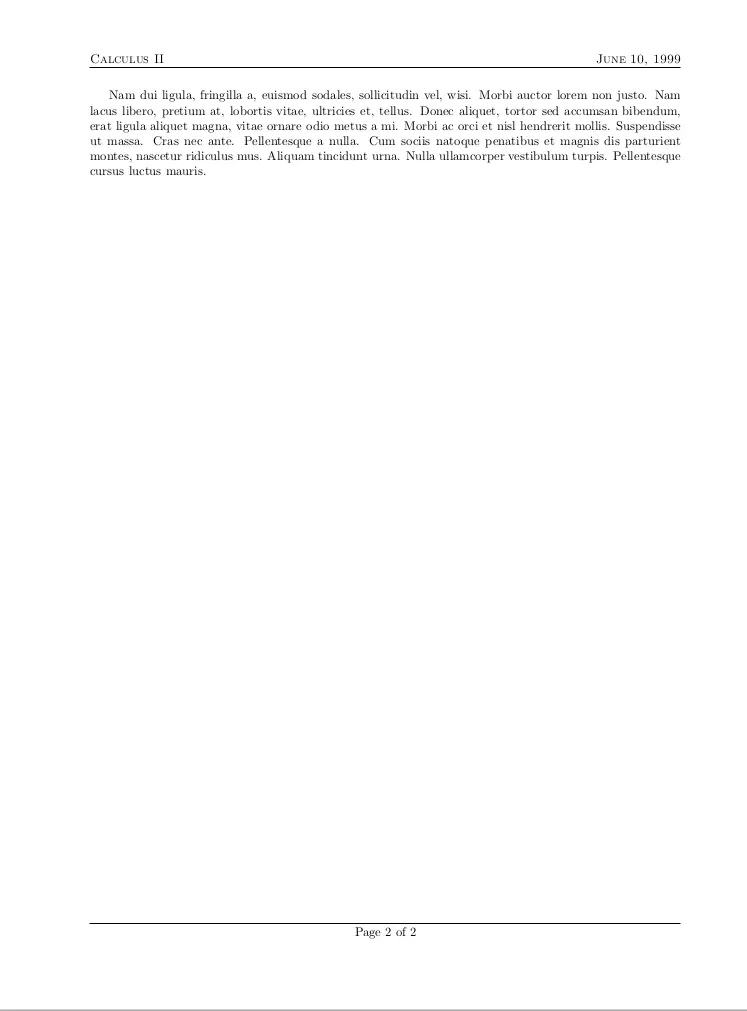
\runningheader{\sc Calculus II}{}{\sc June 10, 1999}
\runningheadrule
\runningfootrule
\runningfooter{}{Page \thepage\ of \numpages}{}
\begin{document}
\lipsum[0]
\newpage
\lipsum[1]
\newpage
\lipsum[2]
\newpage
\end{document}
In this case, we have also changed the typography of the headers, putting it in small caps (that’s what the \sc command does), and we have used rules both at header and footer, except for the first page, in which no rule at the header appears. You can see how this style looks for the first page and how it looks for the running pages in the following images:
Conclusion
In this tutorial, we have presented the basic tools that the exam package provides. With the information and examples here collected, you can start writing your own exams with little to no LaTeX knowledge. However, this small guide is far from exhausting all the possibilities that the exam provides. In the next tutorials, you will find more detailed explanations on how to write type-specific exams, how to further customize headers and footers, how to automatically typeset grading tables and many other things.